This page describes the design and production of an (optionally) electrically assisted shopping cart to be used by an individual who can still stand and walk, but would rather not carry the equivalent of four paper grocery bags full in one or more backpacks, for a distance of 3-4 blocks. I have done this in the past, but am now in the process of becoming too old for this task comfortably. Both my spouse and I have been using a simpler and smaller 3 wheeled child jogger with no electric assist, and this has worked well for a number of years. Both this older model, and the new optional "e" version, can be used to do the shopping inside the grocery store as well as the transport between home and the store. The new trailer will be basically designed for non-assist mode, but it will have an optional "pusher" (motorized platform) attached to the back that the shopper can stand on. Steering is accomplished in the same manner as if the shopper was just walking behind the trailer. Acceleration and braking will be handled by controls similar to those found on ebikes and electric skateboards (with which I'm sure you're familiar with).
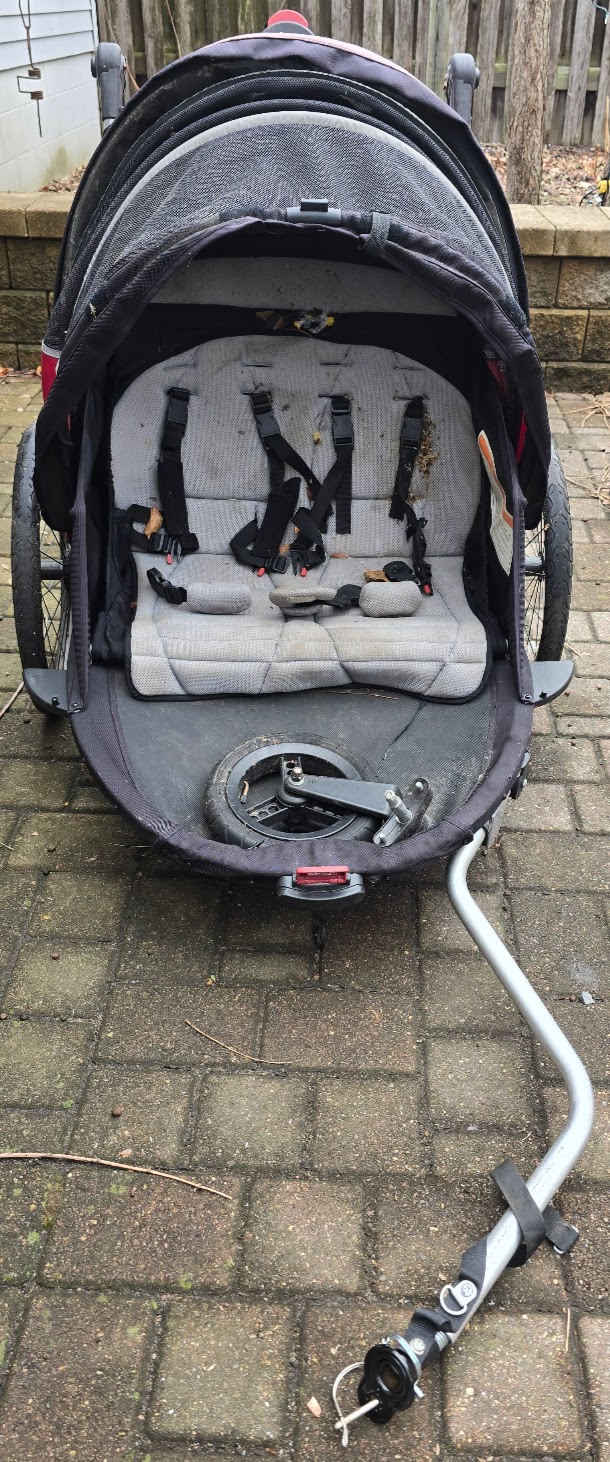
This project was conceived during a dream and was refined during some wakeful periods after the initial dream. Finding this "landfill bound" Schwinn 'Joyrider' dual-kid bike trailer/jogger two days later in our alley just two doors down sealed the deal. My electric assist grocery getter vehicle design idea began with just such a three-wheeled device. The following two photos show it in all its glory. Mfg. date unknown (see below), and several web sources put the original price at $350 to $480, giving this model positive reviews. It was somewhat the worse for outdoor exposure, and the tires were flat, but everything else -- including the two bottle holders -- seemed to be fully functional. Thanks Bucky!!
Viewed from the front you can see the massive amount of material dedicated to the comfort and safety of two small riders. The tubes used to provide shape to the canopy are made of bent steel, effectively making this a roll cage in addition to providing weather protection. All of this will be removed, cutting significant weight from the 40 pound trailer.
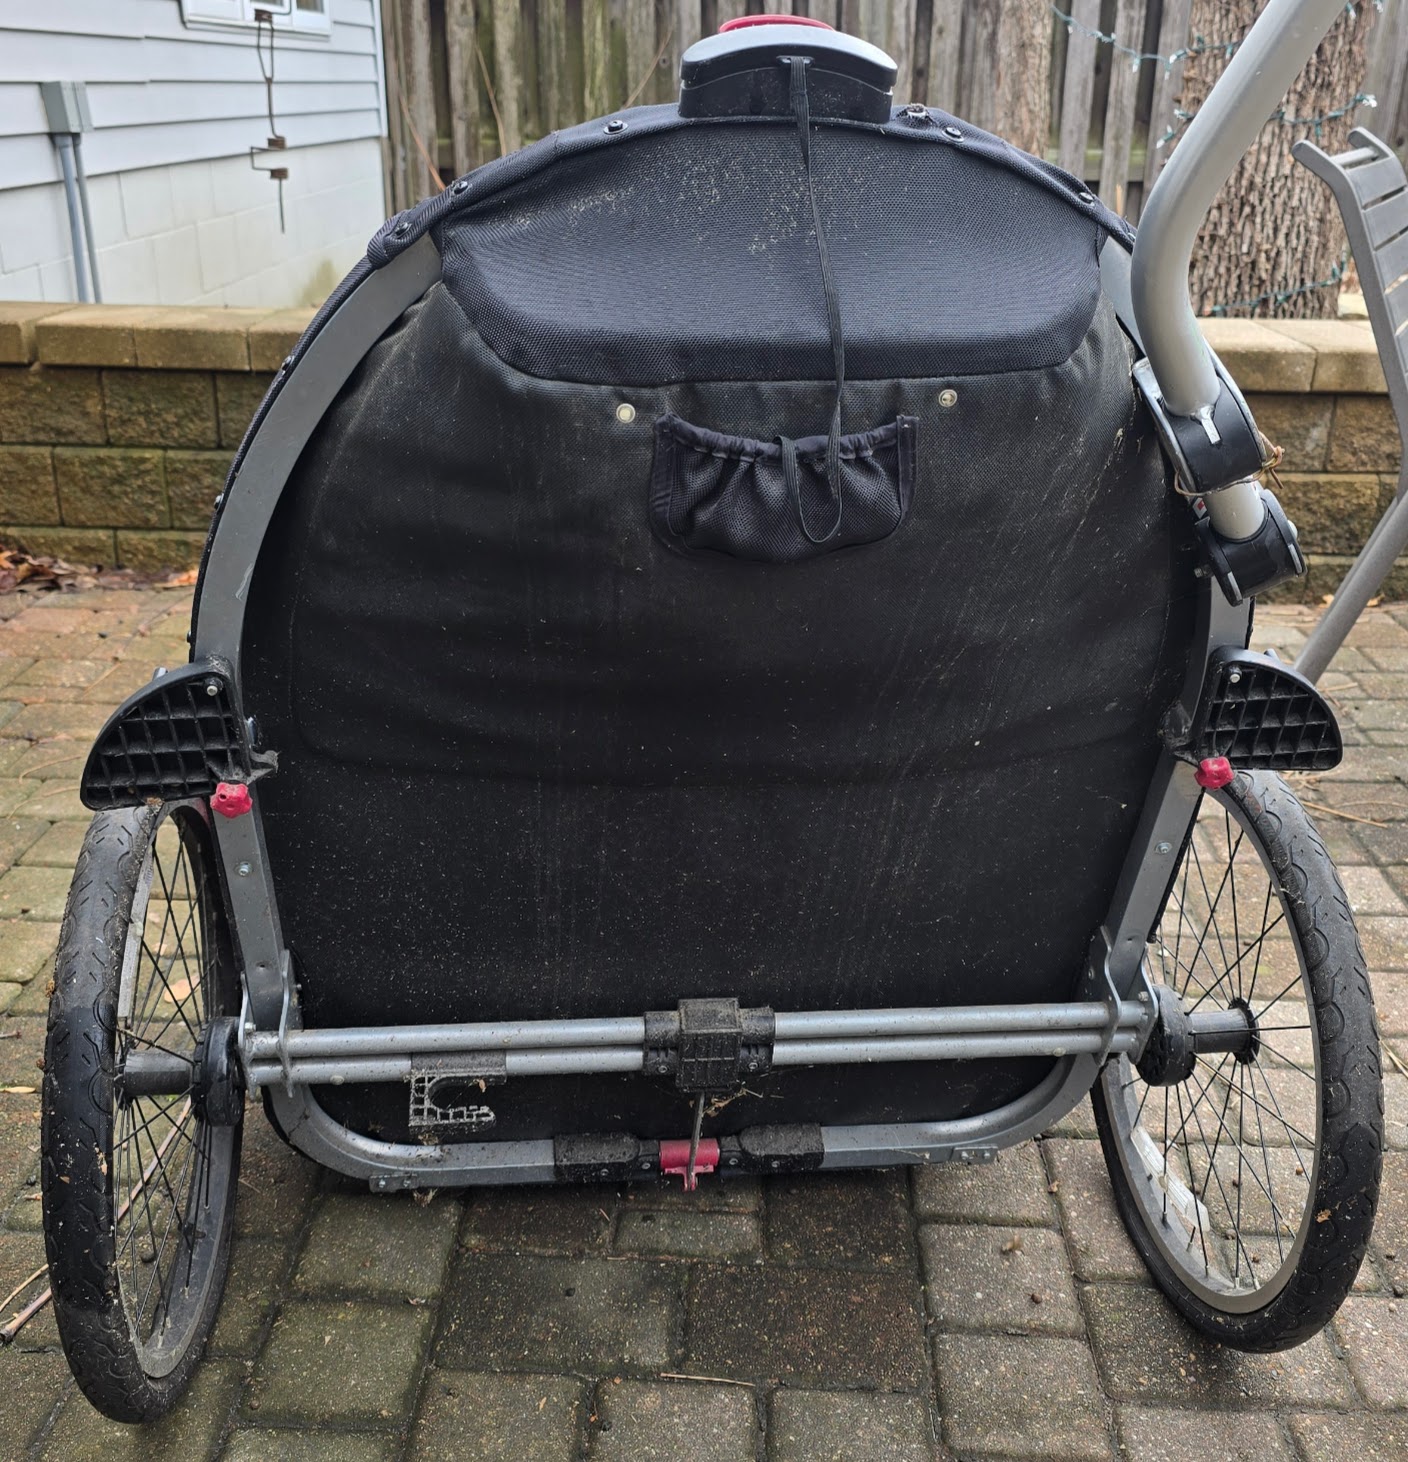
The bottom view shows the all-aluminum tube under-carriage, along with the 20" spoke bike wheels. It is this design which makes this trailer/stroller ideal for our re-purposing, since we will be connecting our motorized 'pusher' platform to this dual-tube axle assembly. The spoked wheels allow for great performance and low-weight, as well as fitting in with our ample collection of 20" bike wheel parts. The wheels can be removed by simply pushing a button in the wheel's hub and sliding the wheels out of the special stub-axle retainer. This design is well-proven and also used in high-end wheelchairs. The spoked wheels, tubes and tires are Kenda branded, a respectable quality OEM provider, and will likely be re-used, if possible.
Although the brand this trailer was originally sold under was Schwinn, the original manufacturer's label shows a "Pacific Cycle" label for a factory in China, with a mfg. date of "GBP 11 05," which could mean November 2005 or May 2011, or ???. We'll paste this label into grok and see what it comes up with. AI tells us that "Schwinn" is a trademark now owned by Pacific Cycle, and that the manufacturing date was probably the early 'teens. This youtube video [https://www.youtube.com/watch?v=kuXBcaxXmA0] reviews the actual model used here. Another video, https://youtu.be/x_Zef7CoUy0?si=5Bz7v5ZD5UfO1ivq, reviews this model very favorably.

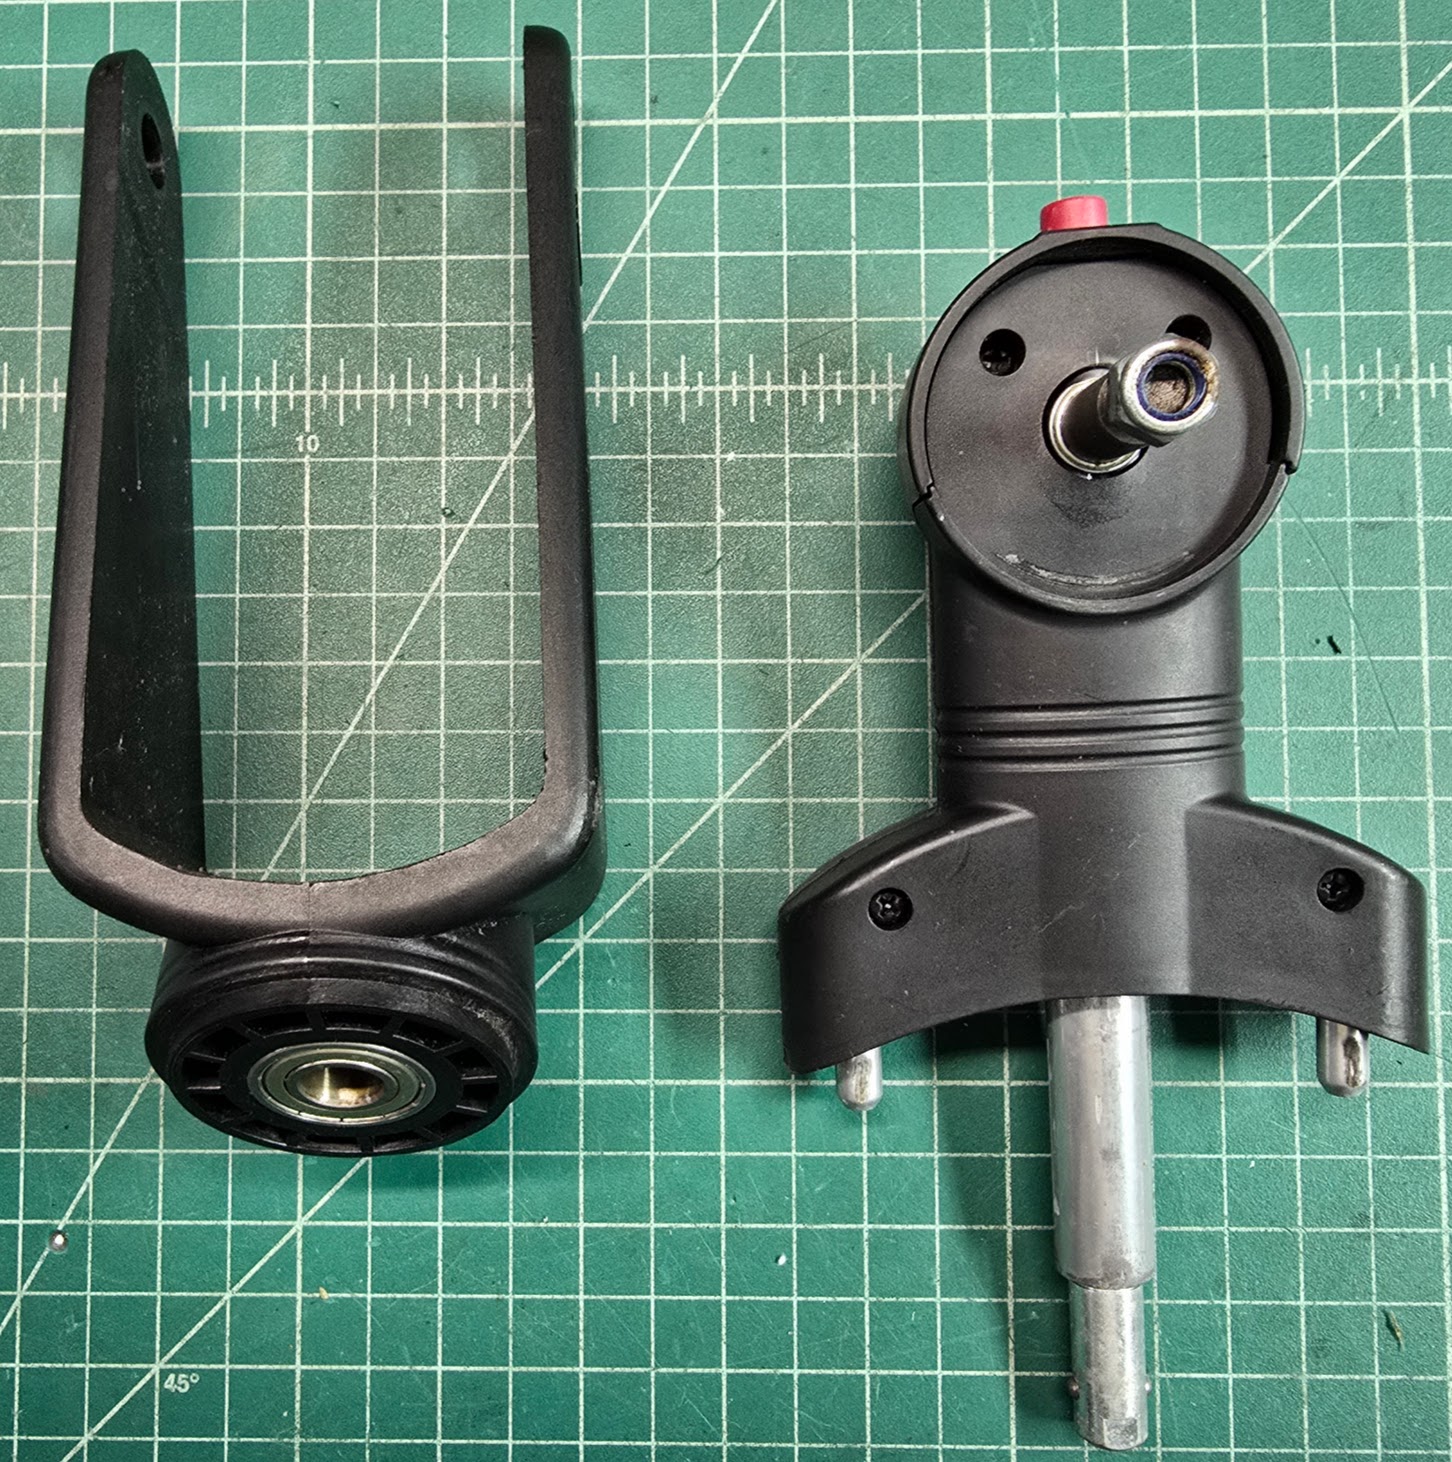
This is the optional use front wheel fork assembly, minus the actual wheel. The red push-button allows it to be inserted into the frame or removed without the need for tools. When GiGi is used as a bike trailer, this would be at the "back" of the trailer and not needed. It might not be needed either when the pusher skatedboard is attached, but that's not yet known.
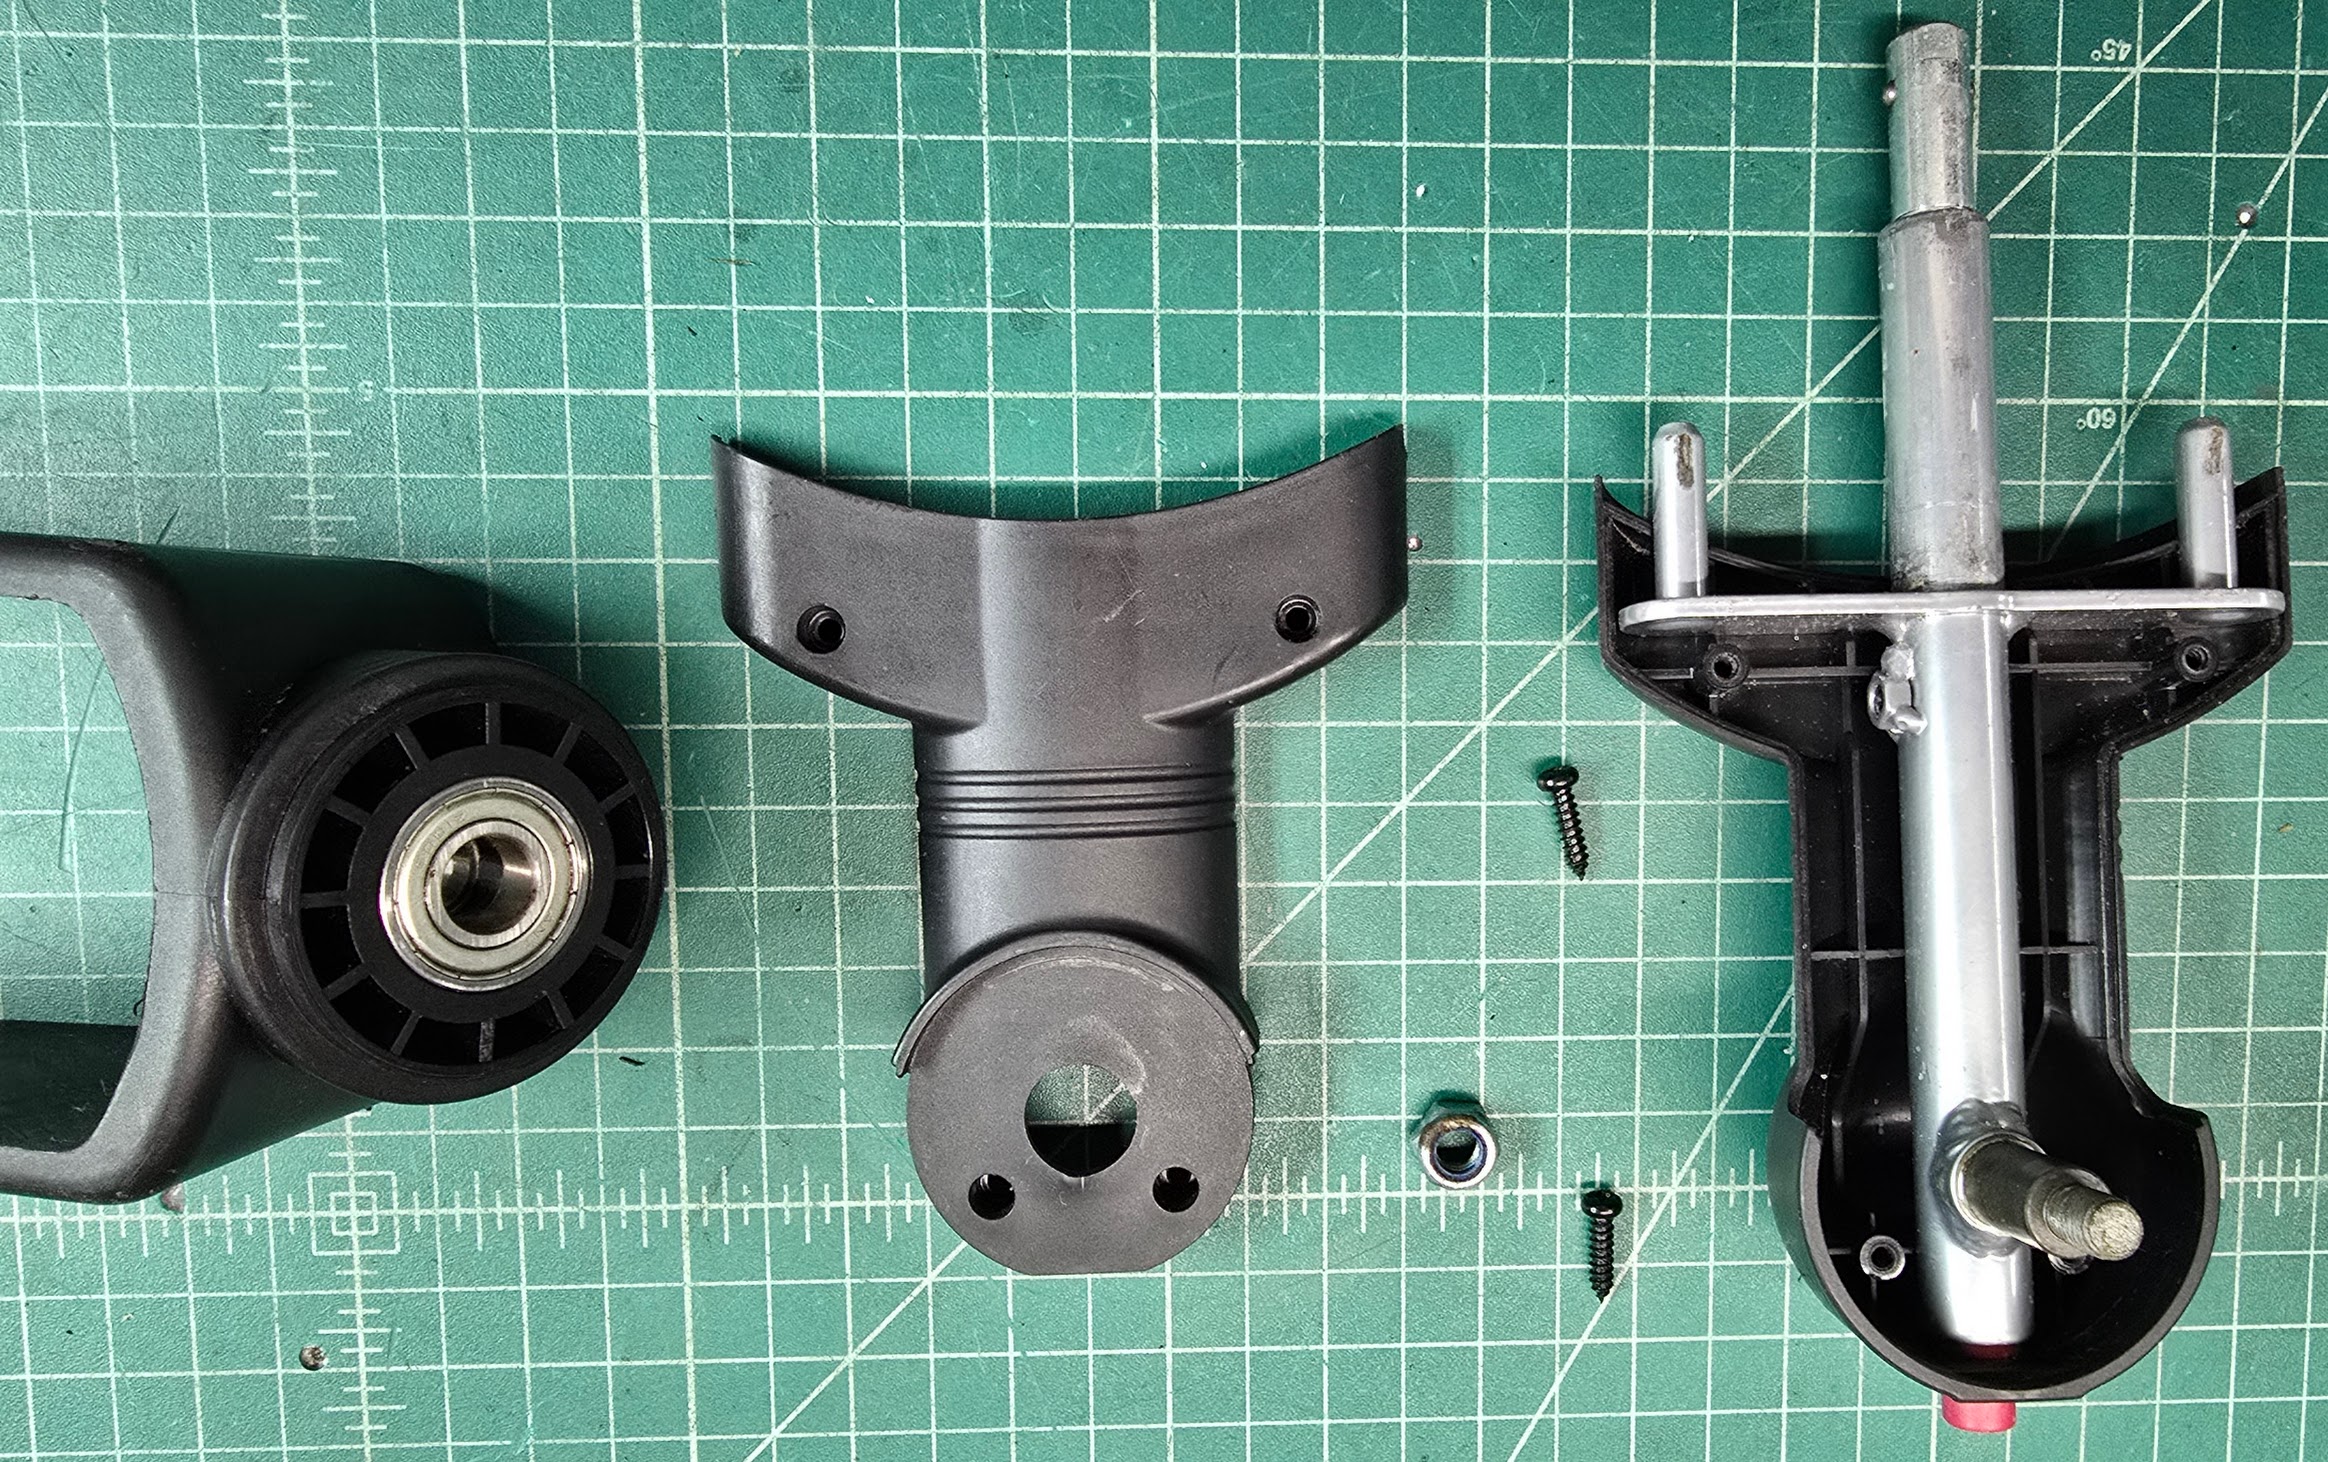
The following disassembled view shows the solid mechanical (steel) construction where it matters. Pushing the spring-loaded button allows two steel balls to recess into the shaft, which can then be simply pulled out of a mating socket in the frame.
The trailer was completely stripped and cleaned. All of the original rubber (tires and tubes) were re-used, although both tubes needed patching due to inadequate protection from the spoke nuts. With thorough cleaning, adding some good rim tape, and re-assembly, the frame and wheels are fully functional again.
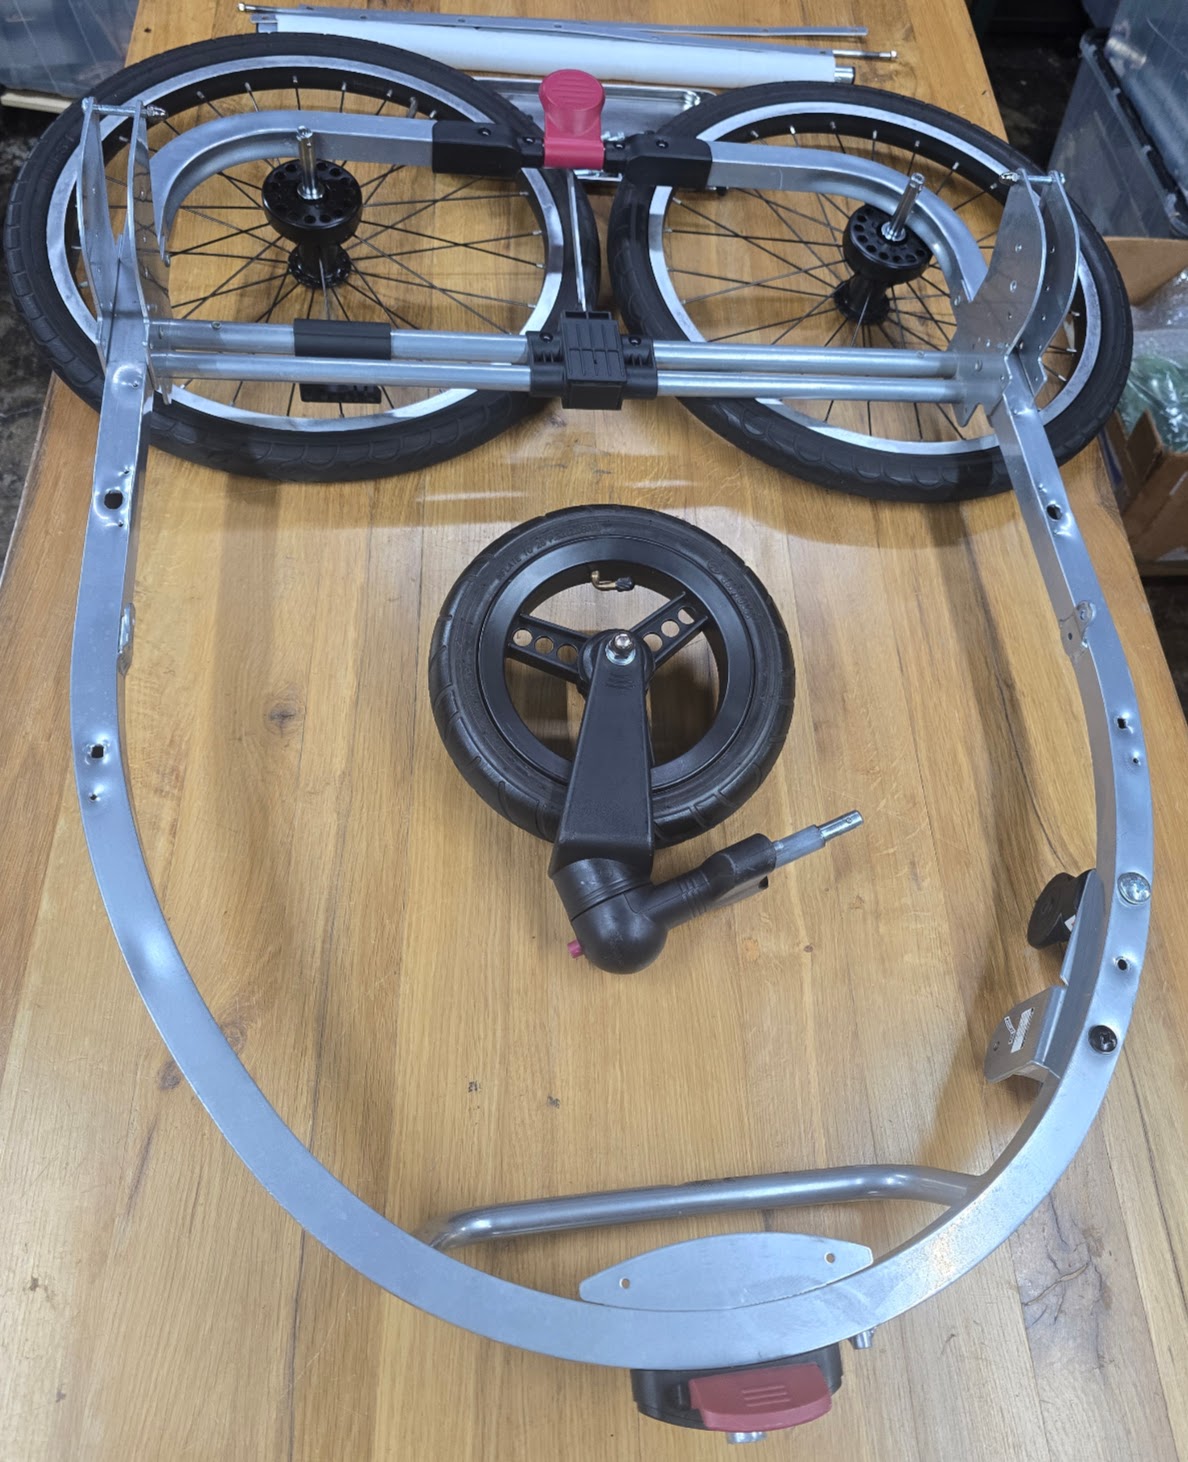
It just takes a few seconds and no tools to attach the three wheels to the bare frame, which can be seen here:
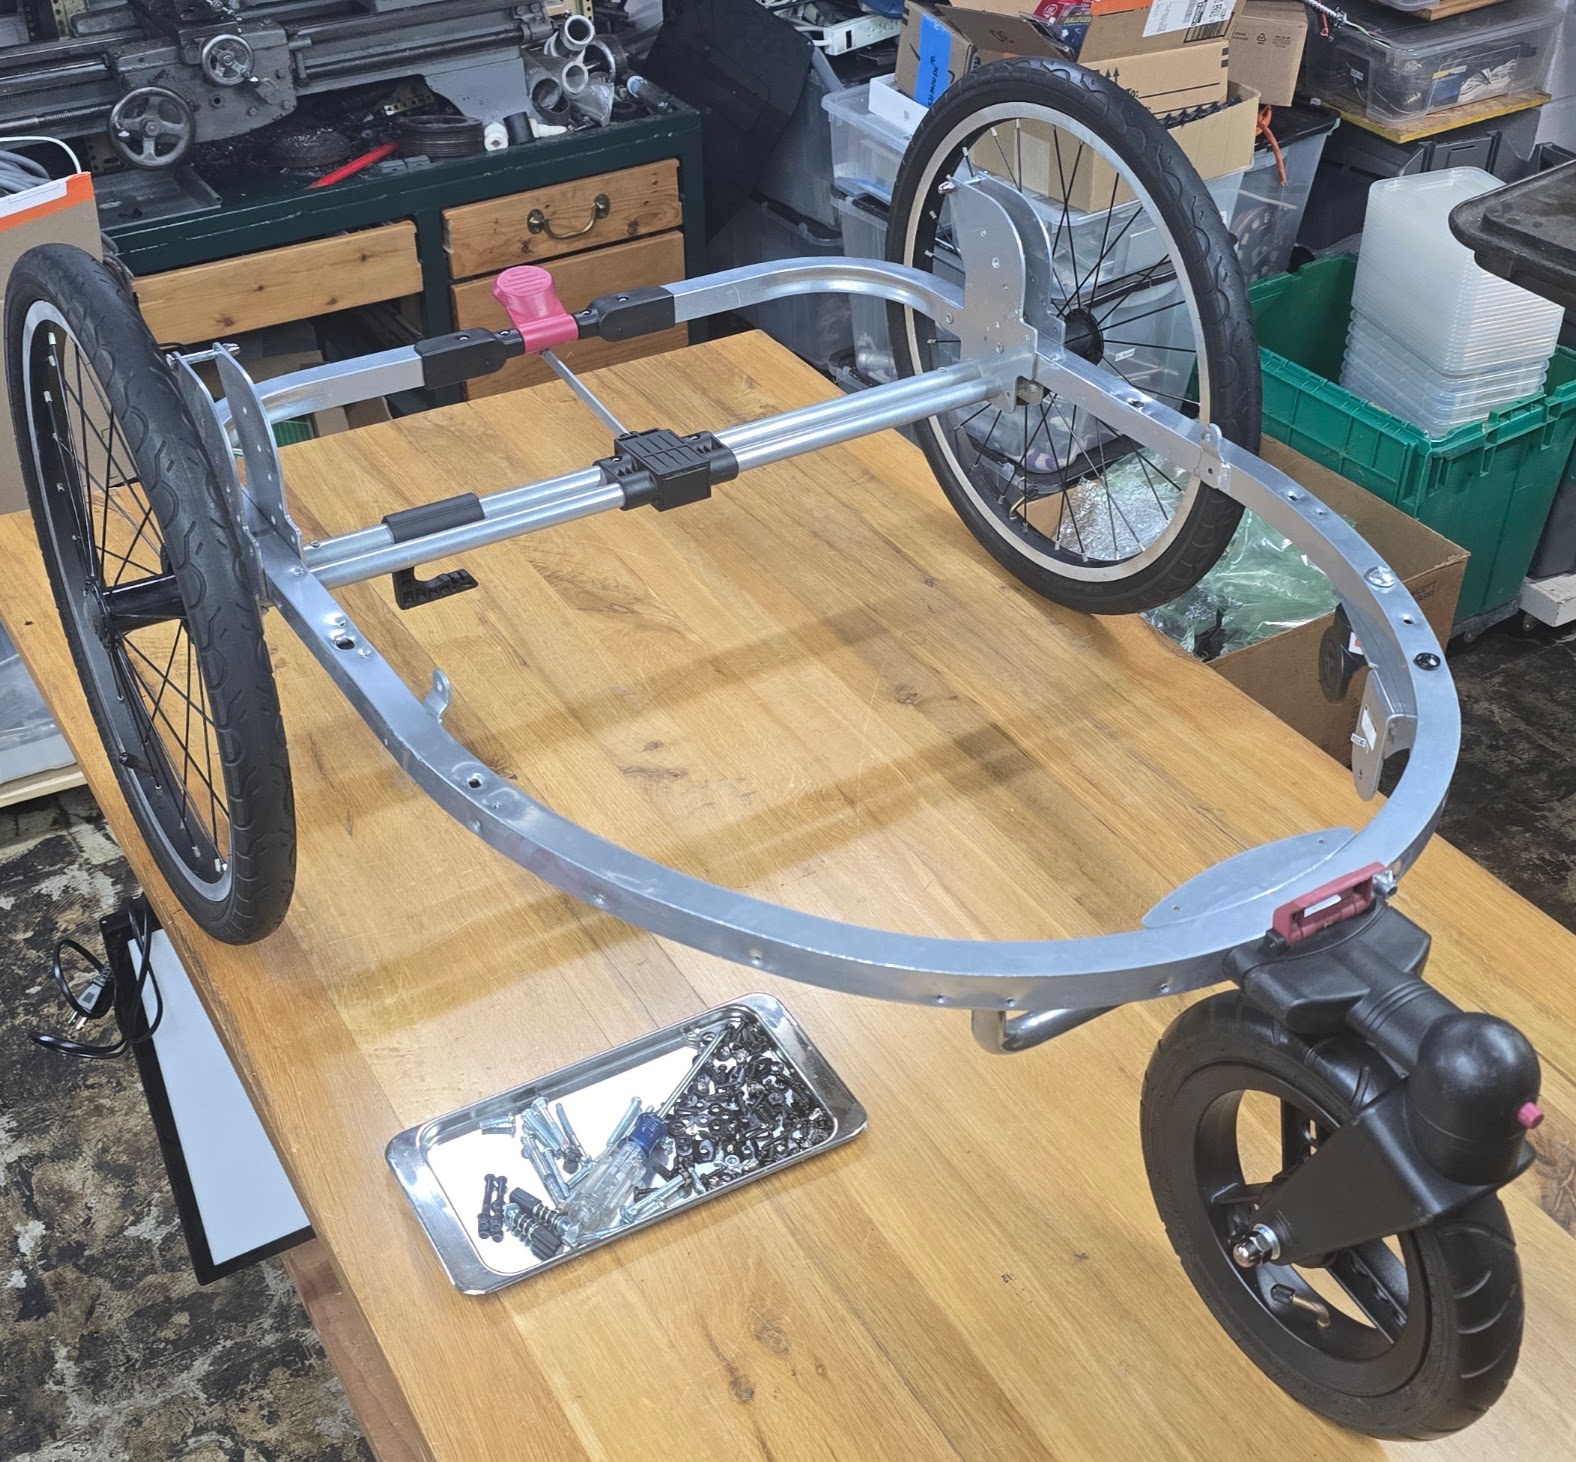
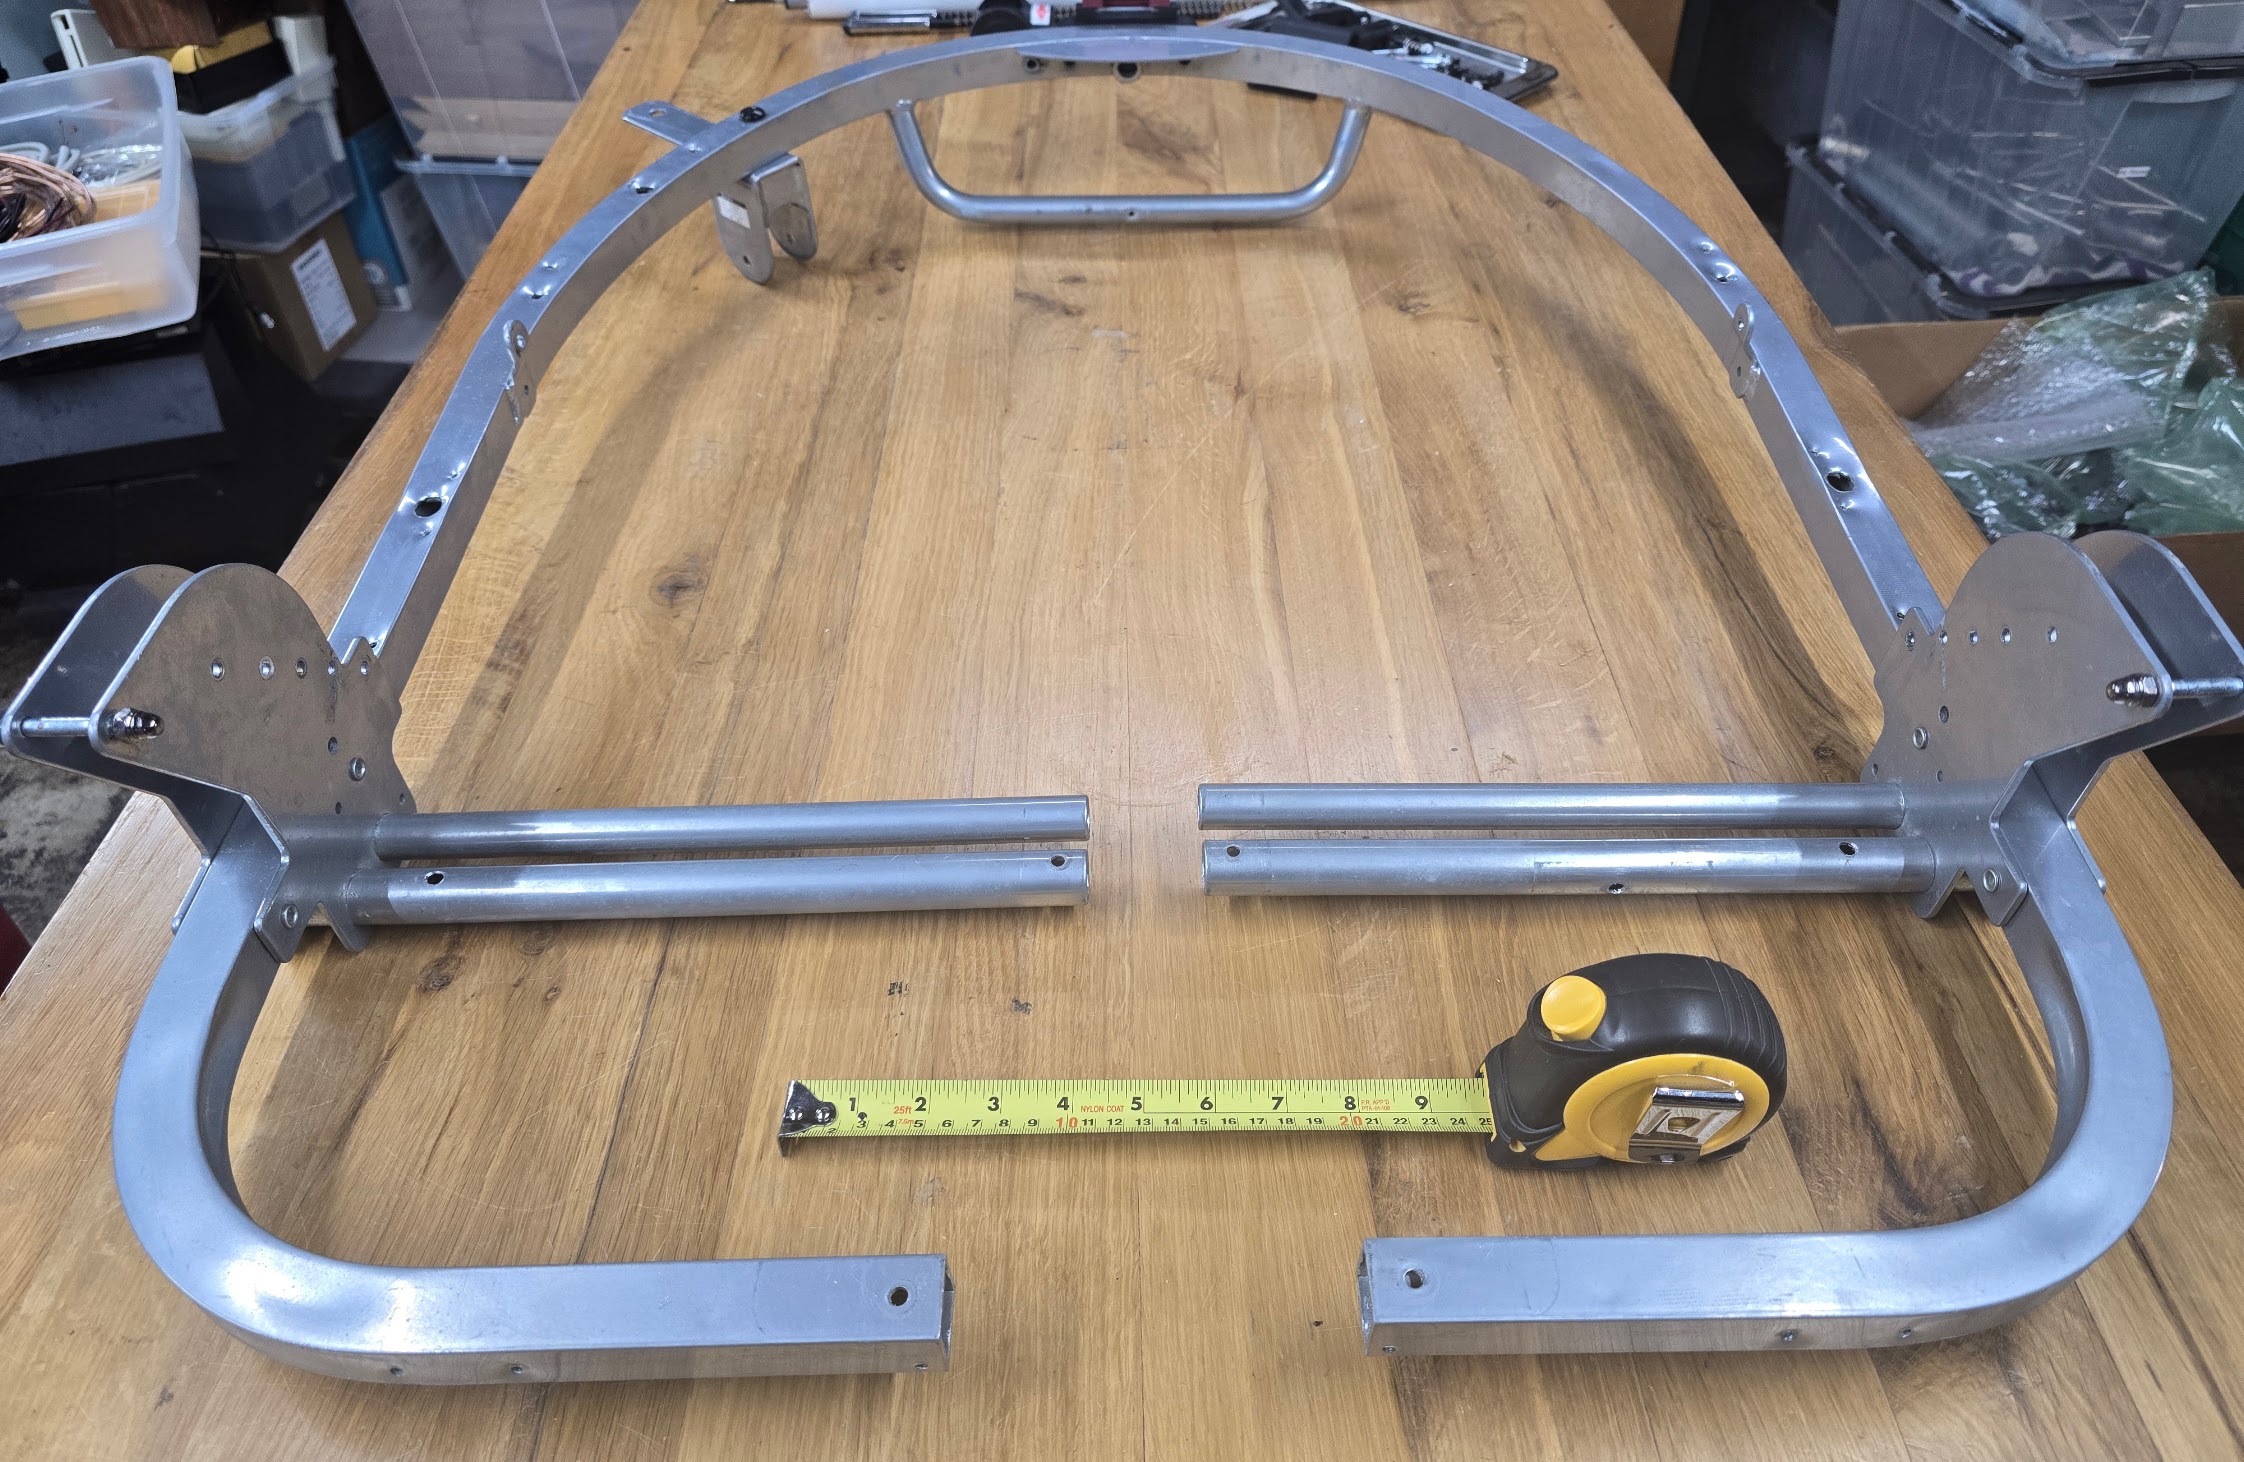
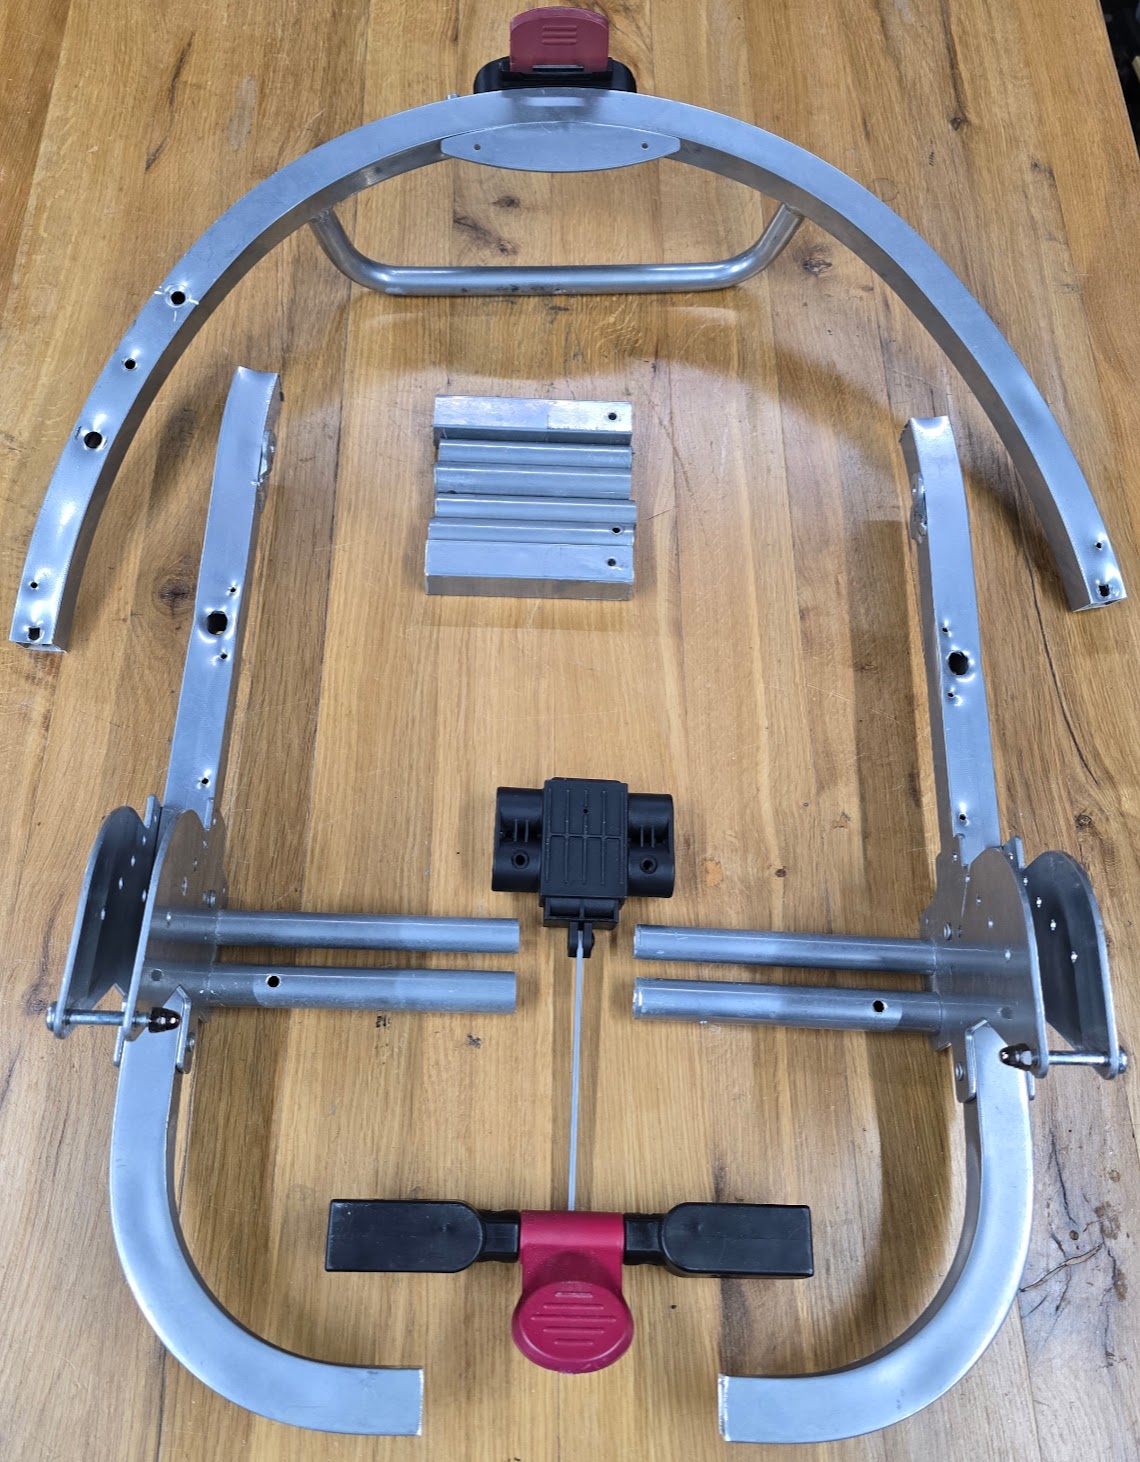
The aluminum frame tubing and the double axle tube assembly are split in the middle to accommodate the trailer's dual function as a trailer to be pulled and a jogger to be pushed. The view below is of the bottom of the frame.
The major drawback for using this particular model is its width. Because it was designed to accommodate two toddlers, it is wider than is needed for our purposes, so the frame width will need to be reduced. As delivered from the factory, the trailer would need a doorway that is at least 34" wide to be pulled through. This width is greater than necessary or desireable. The length of the trailer/jogger, from the front of the front wheel to the rear edge of the frame is 44". This will be shortened as well, depending on the dimensions of the cargo box which will be added to this frame.
We need to remove 8 to 10 inches from the trailer's width, and the logical place to remove this is from the center of the trailer. The first step is to drill out the rivets used to hold the frame and axle supports, which are conveniently in the center of the trailer. We will then remove 4 to 5 inches from each half of the trailer before rejoining the halves.
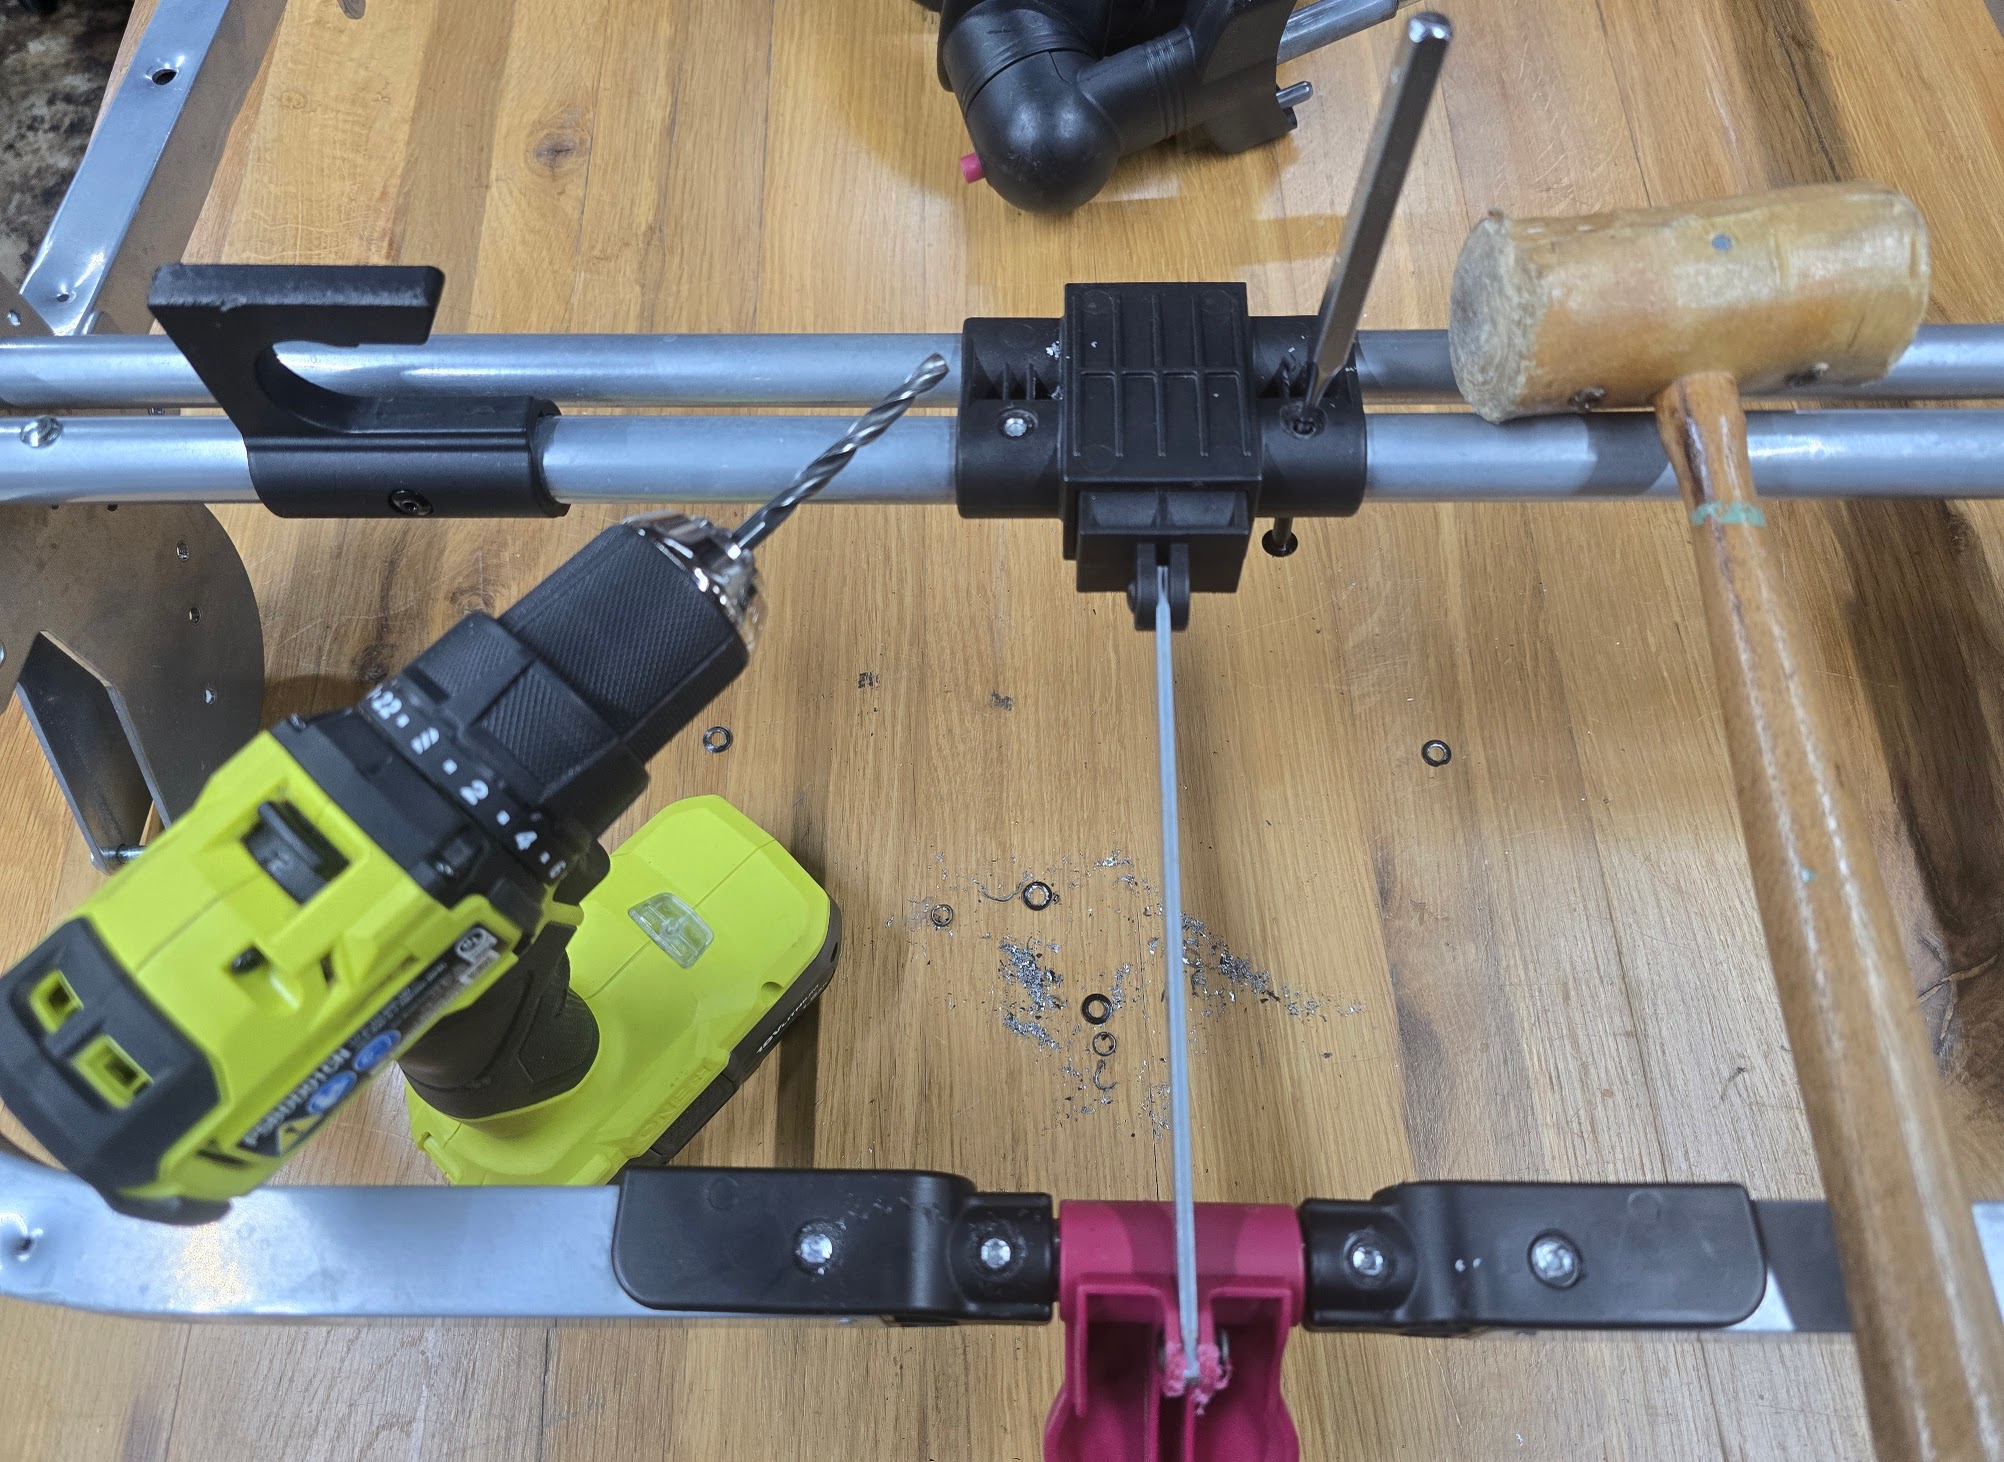
Once the mushroomed ends of the aluminum rivets are drilled off, they can be punched out. We'll likely use stainless steel bolts on reassembly, with whatever shims or bracing is needed for strunctural integrity. The smaller tube contains a spring-loaded latching mechanism that functions as a foot activated parking brake. We are going to try to keep this functional.
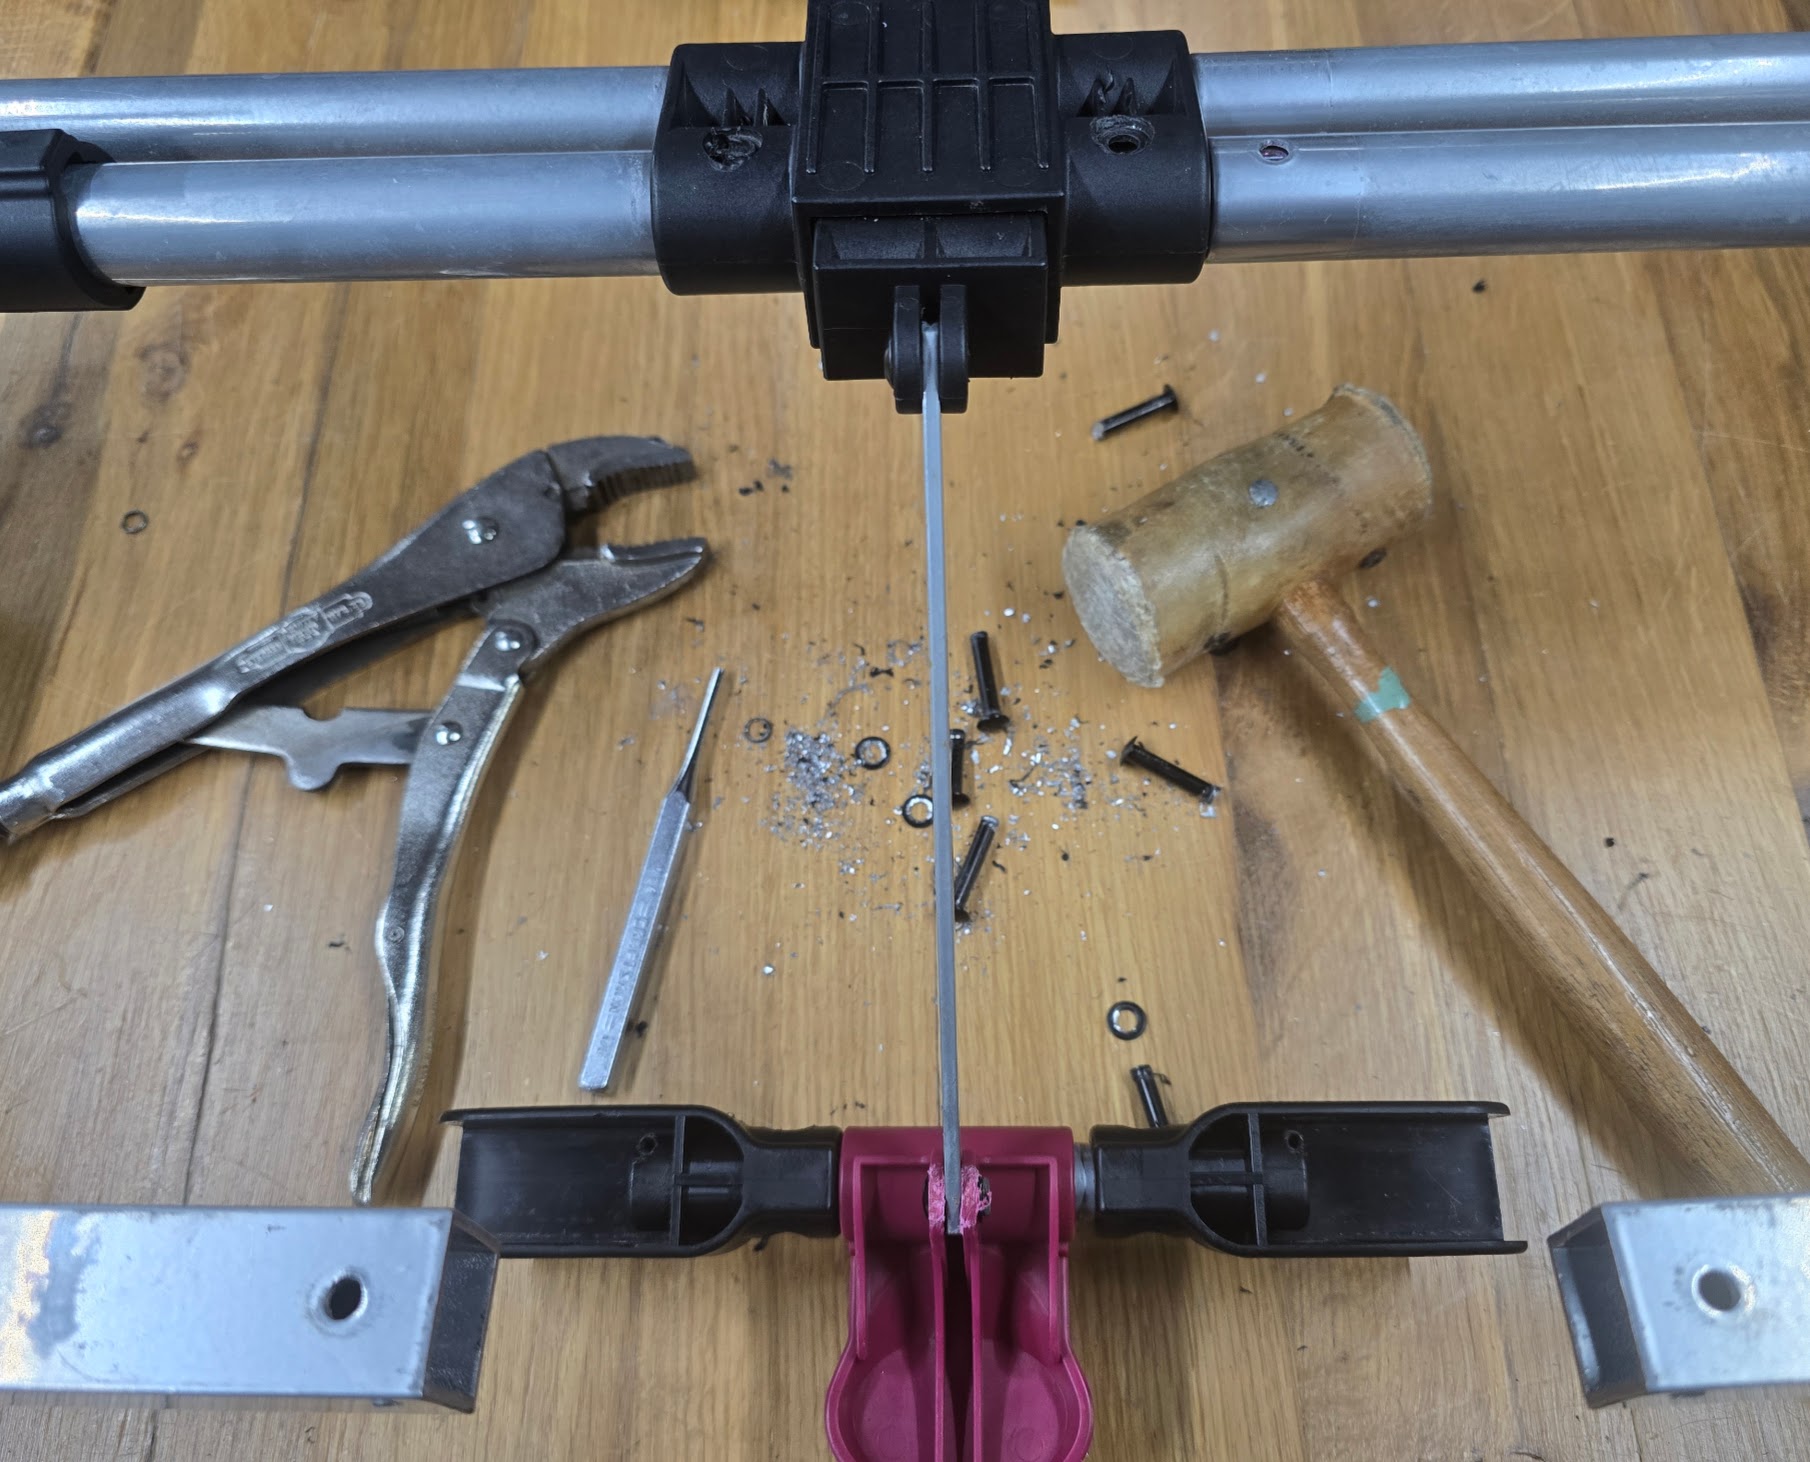
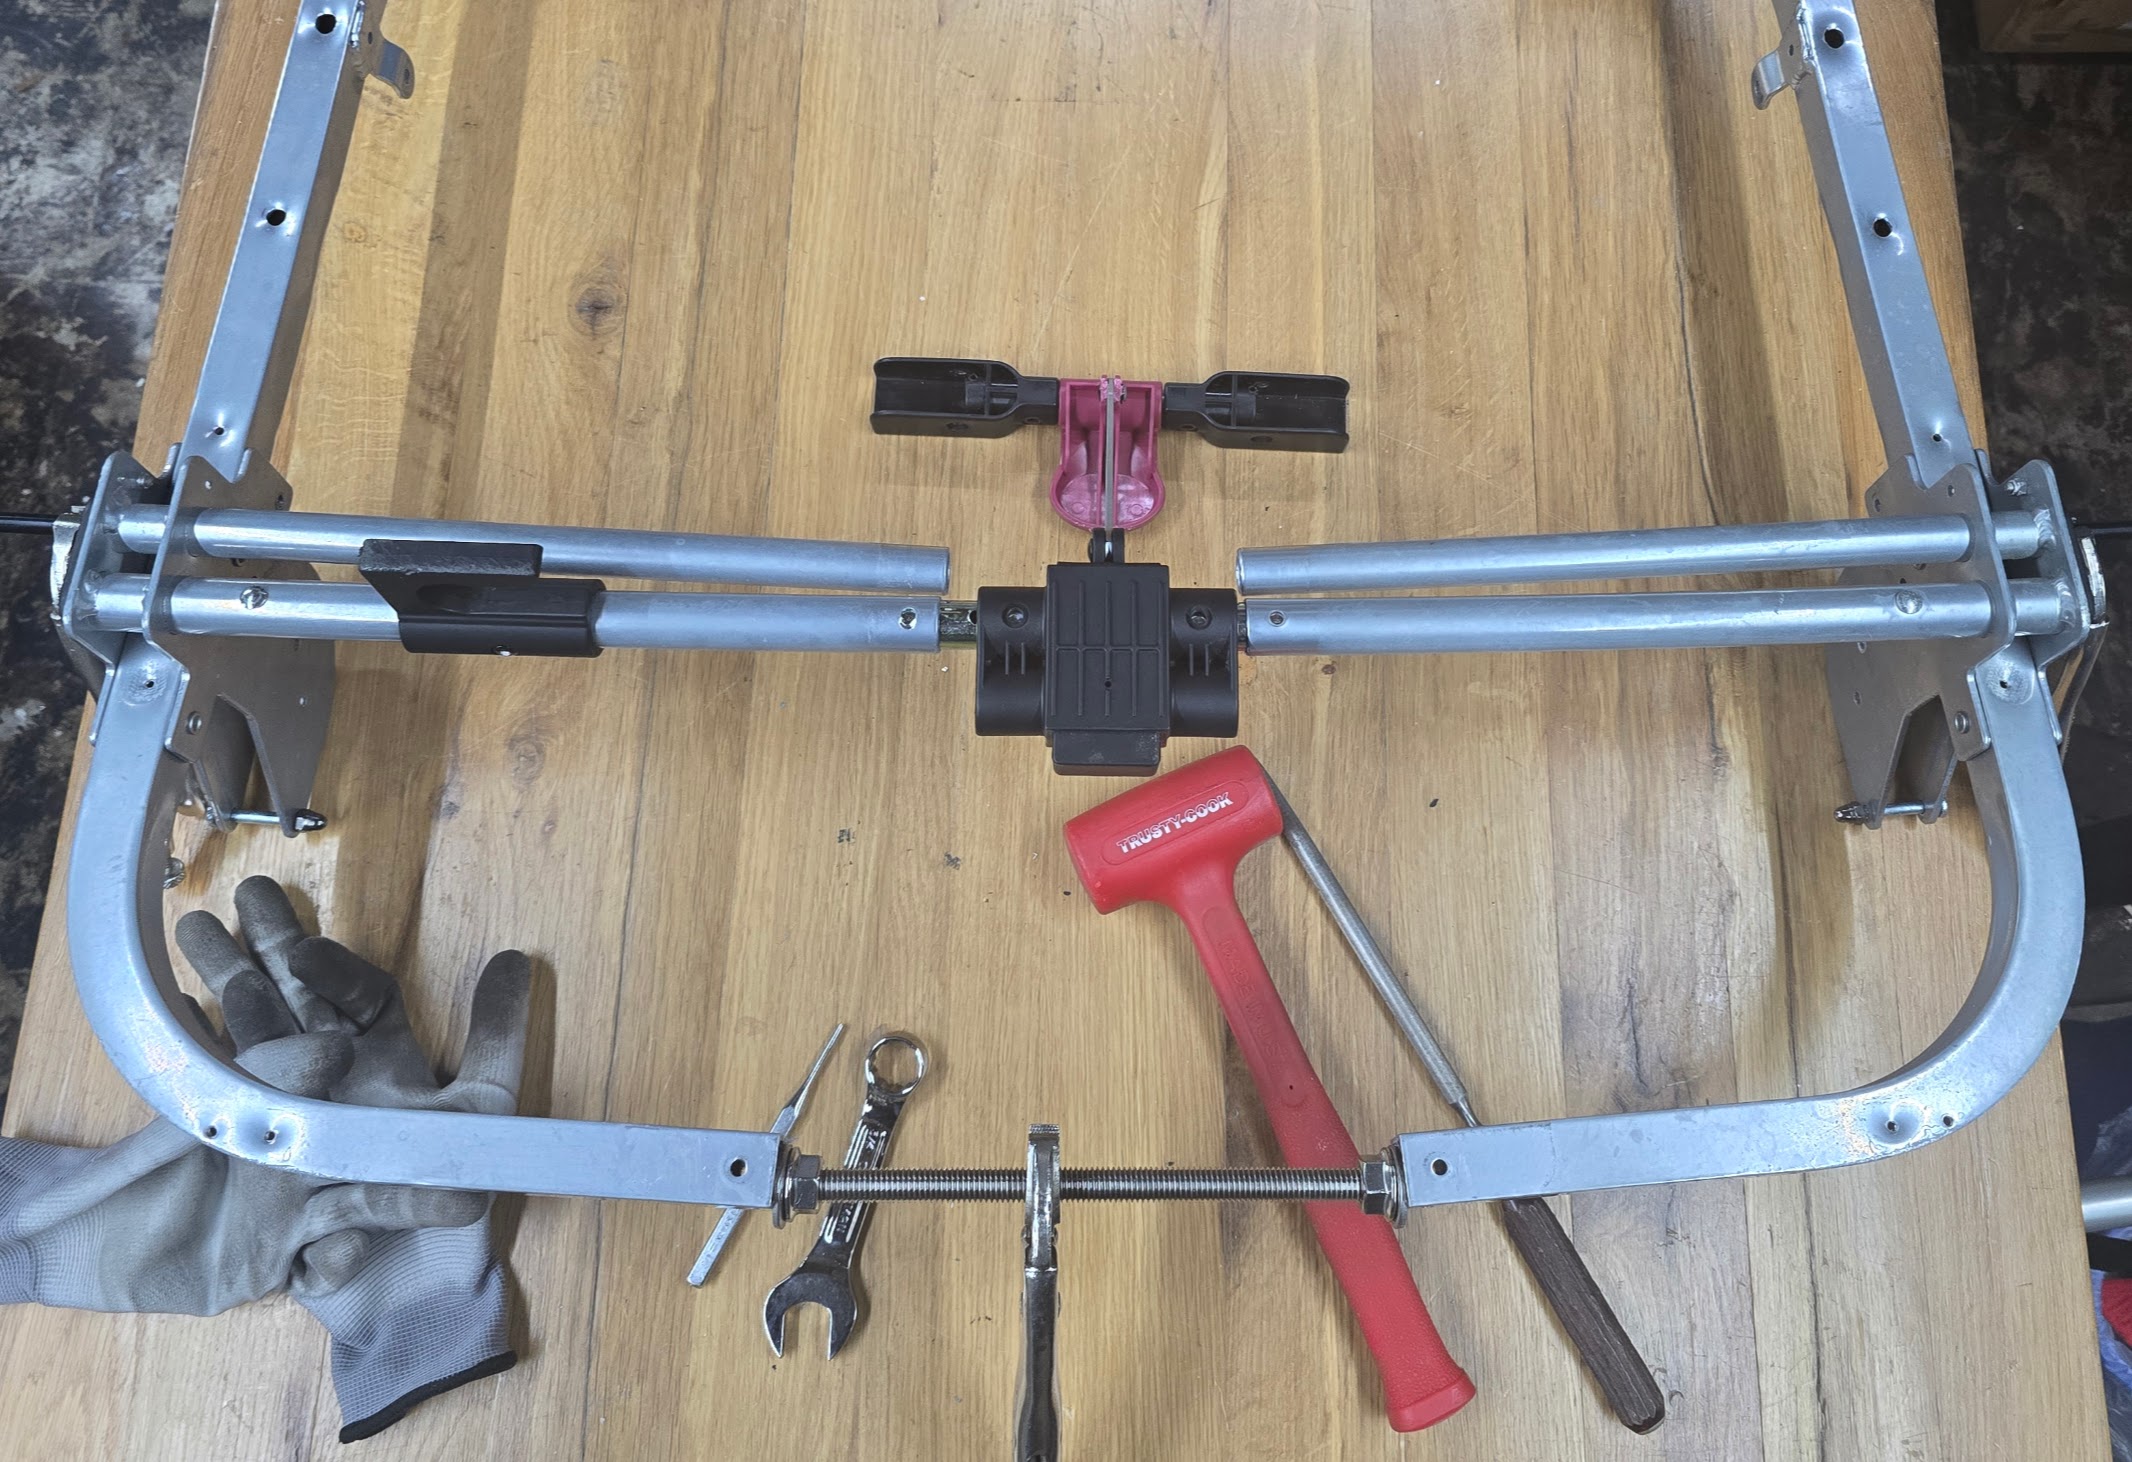
Once all the components are loose, it's time for separation. A DIY "spreader" (all-thread) is being used to create the gap between the axle housing ends so the internal pieces can be removed.
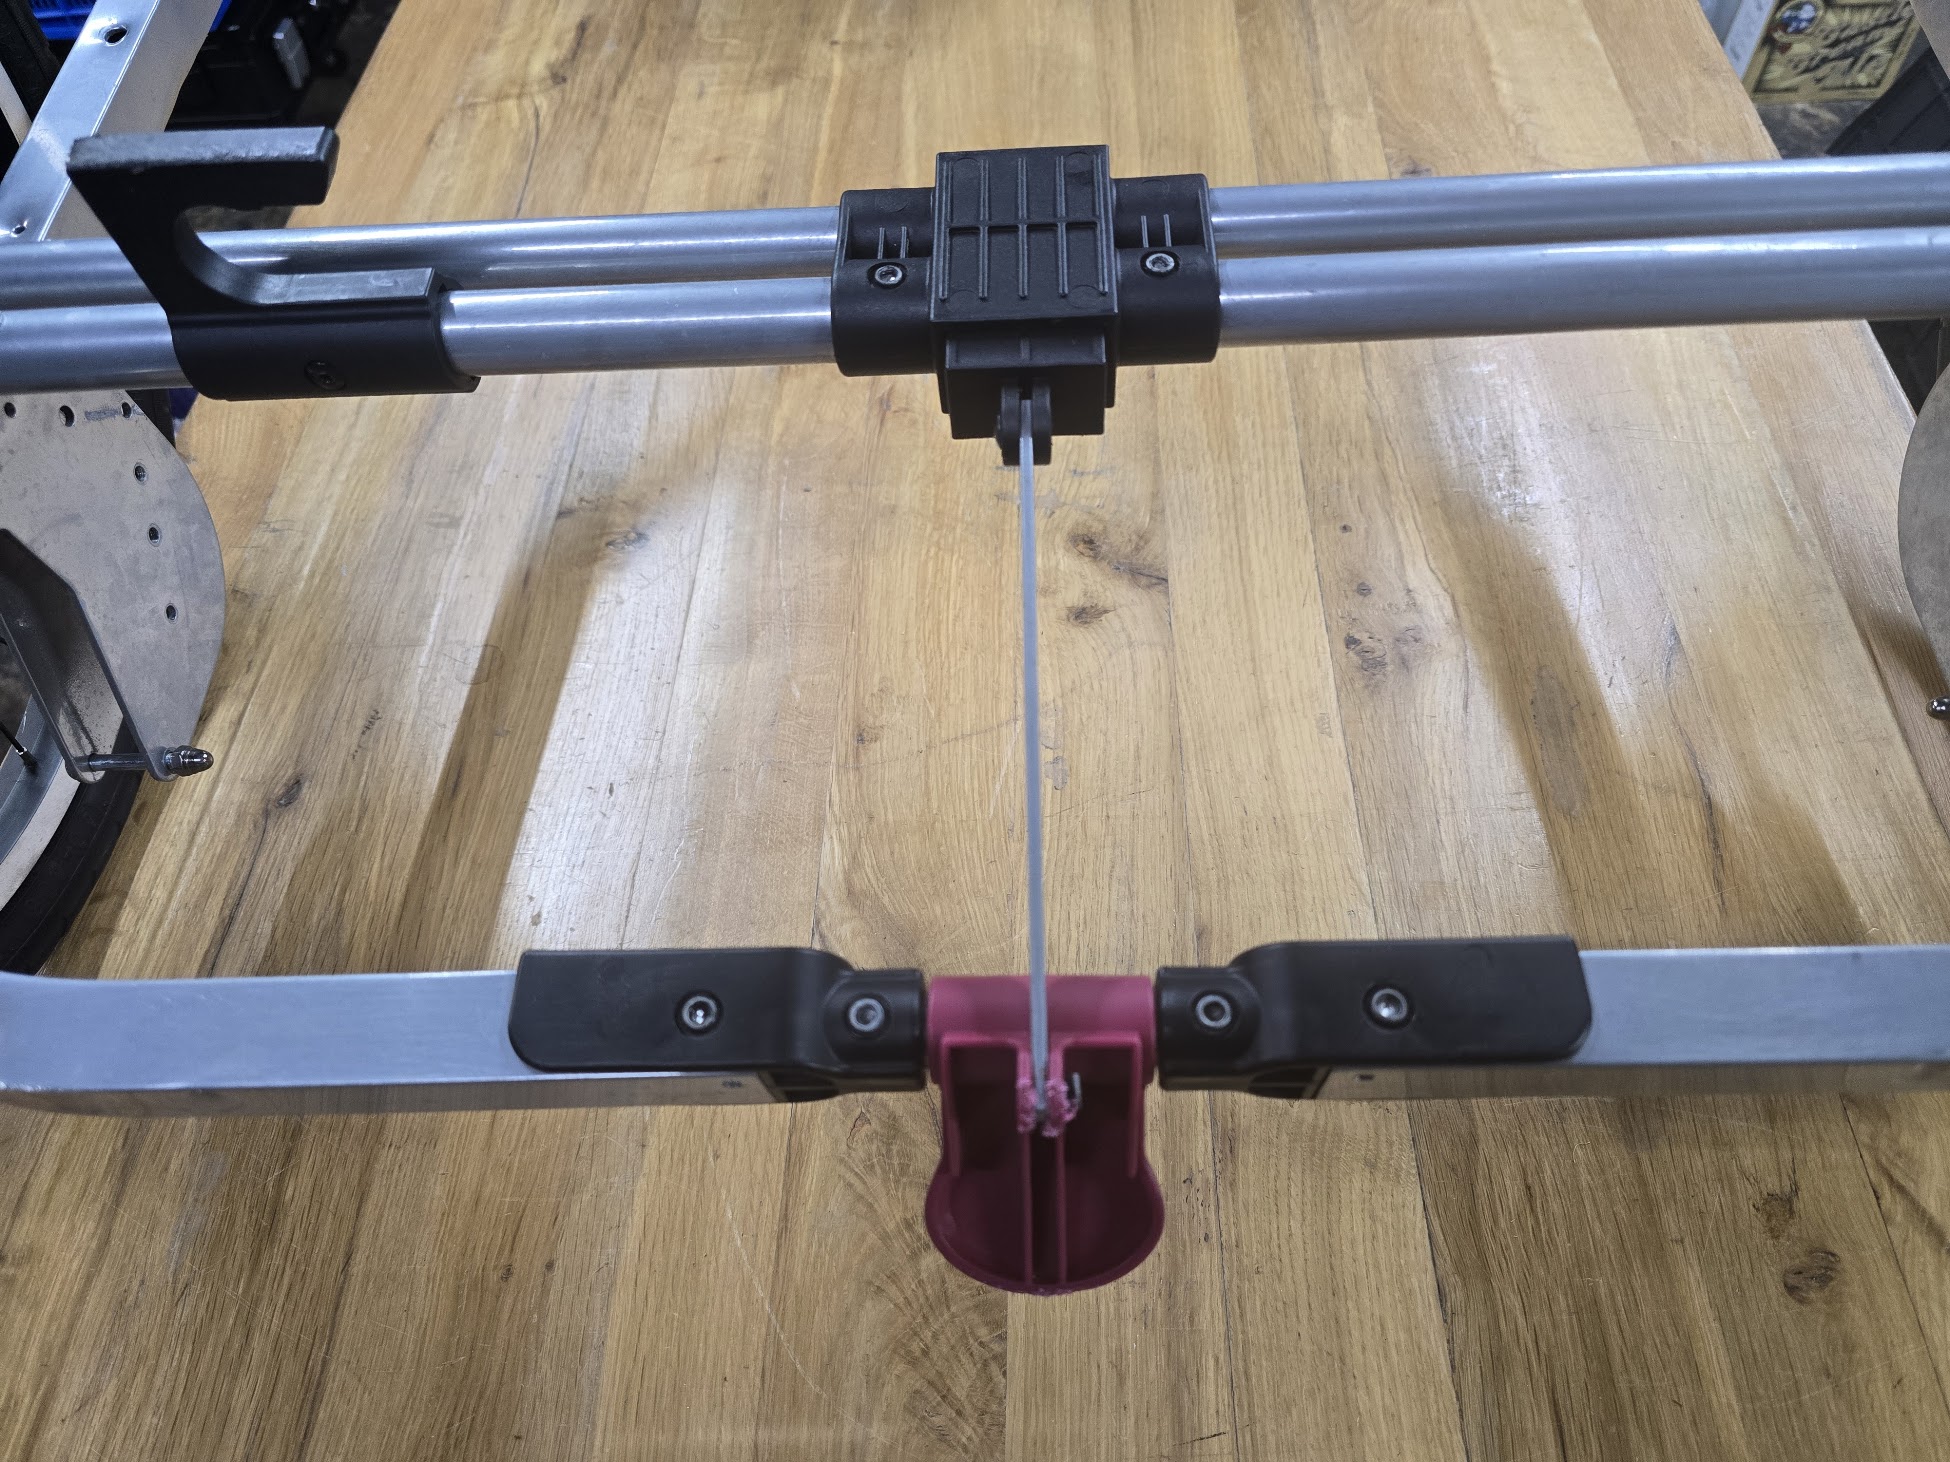
The black box sub-assembly serves as both a junction block to connect the ends of the main axle tube as well as the latching mechanism for the foot-operated parking brake. The black plastic pieces to which the red plastic foot-operated lever attaches are used to join together the very rear part of the trailer frame.
The small hole in the box portion is a recess for the little nubbin in the sliding part of the assembly and serves as a detent for the parking brake's on (or off?) position.
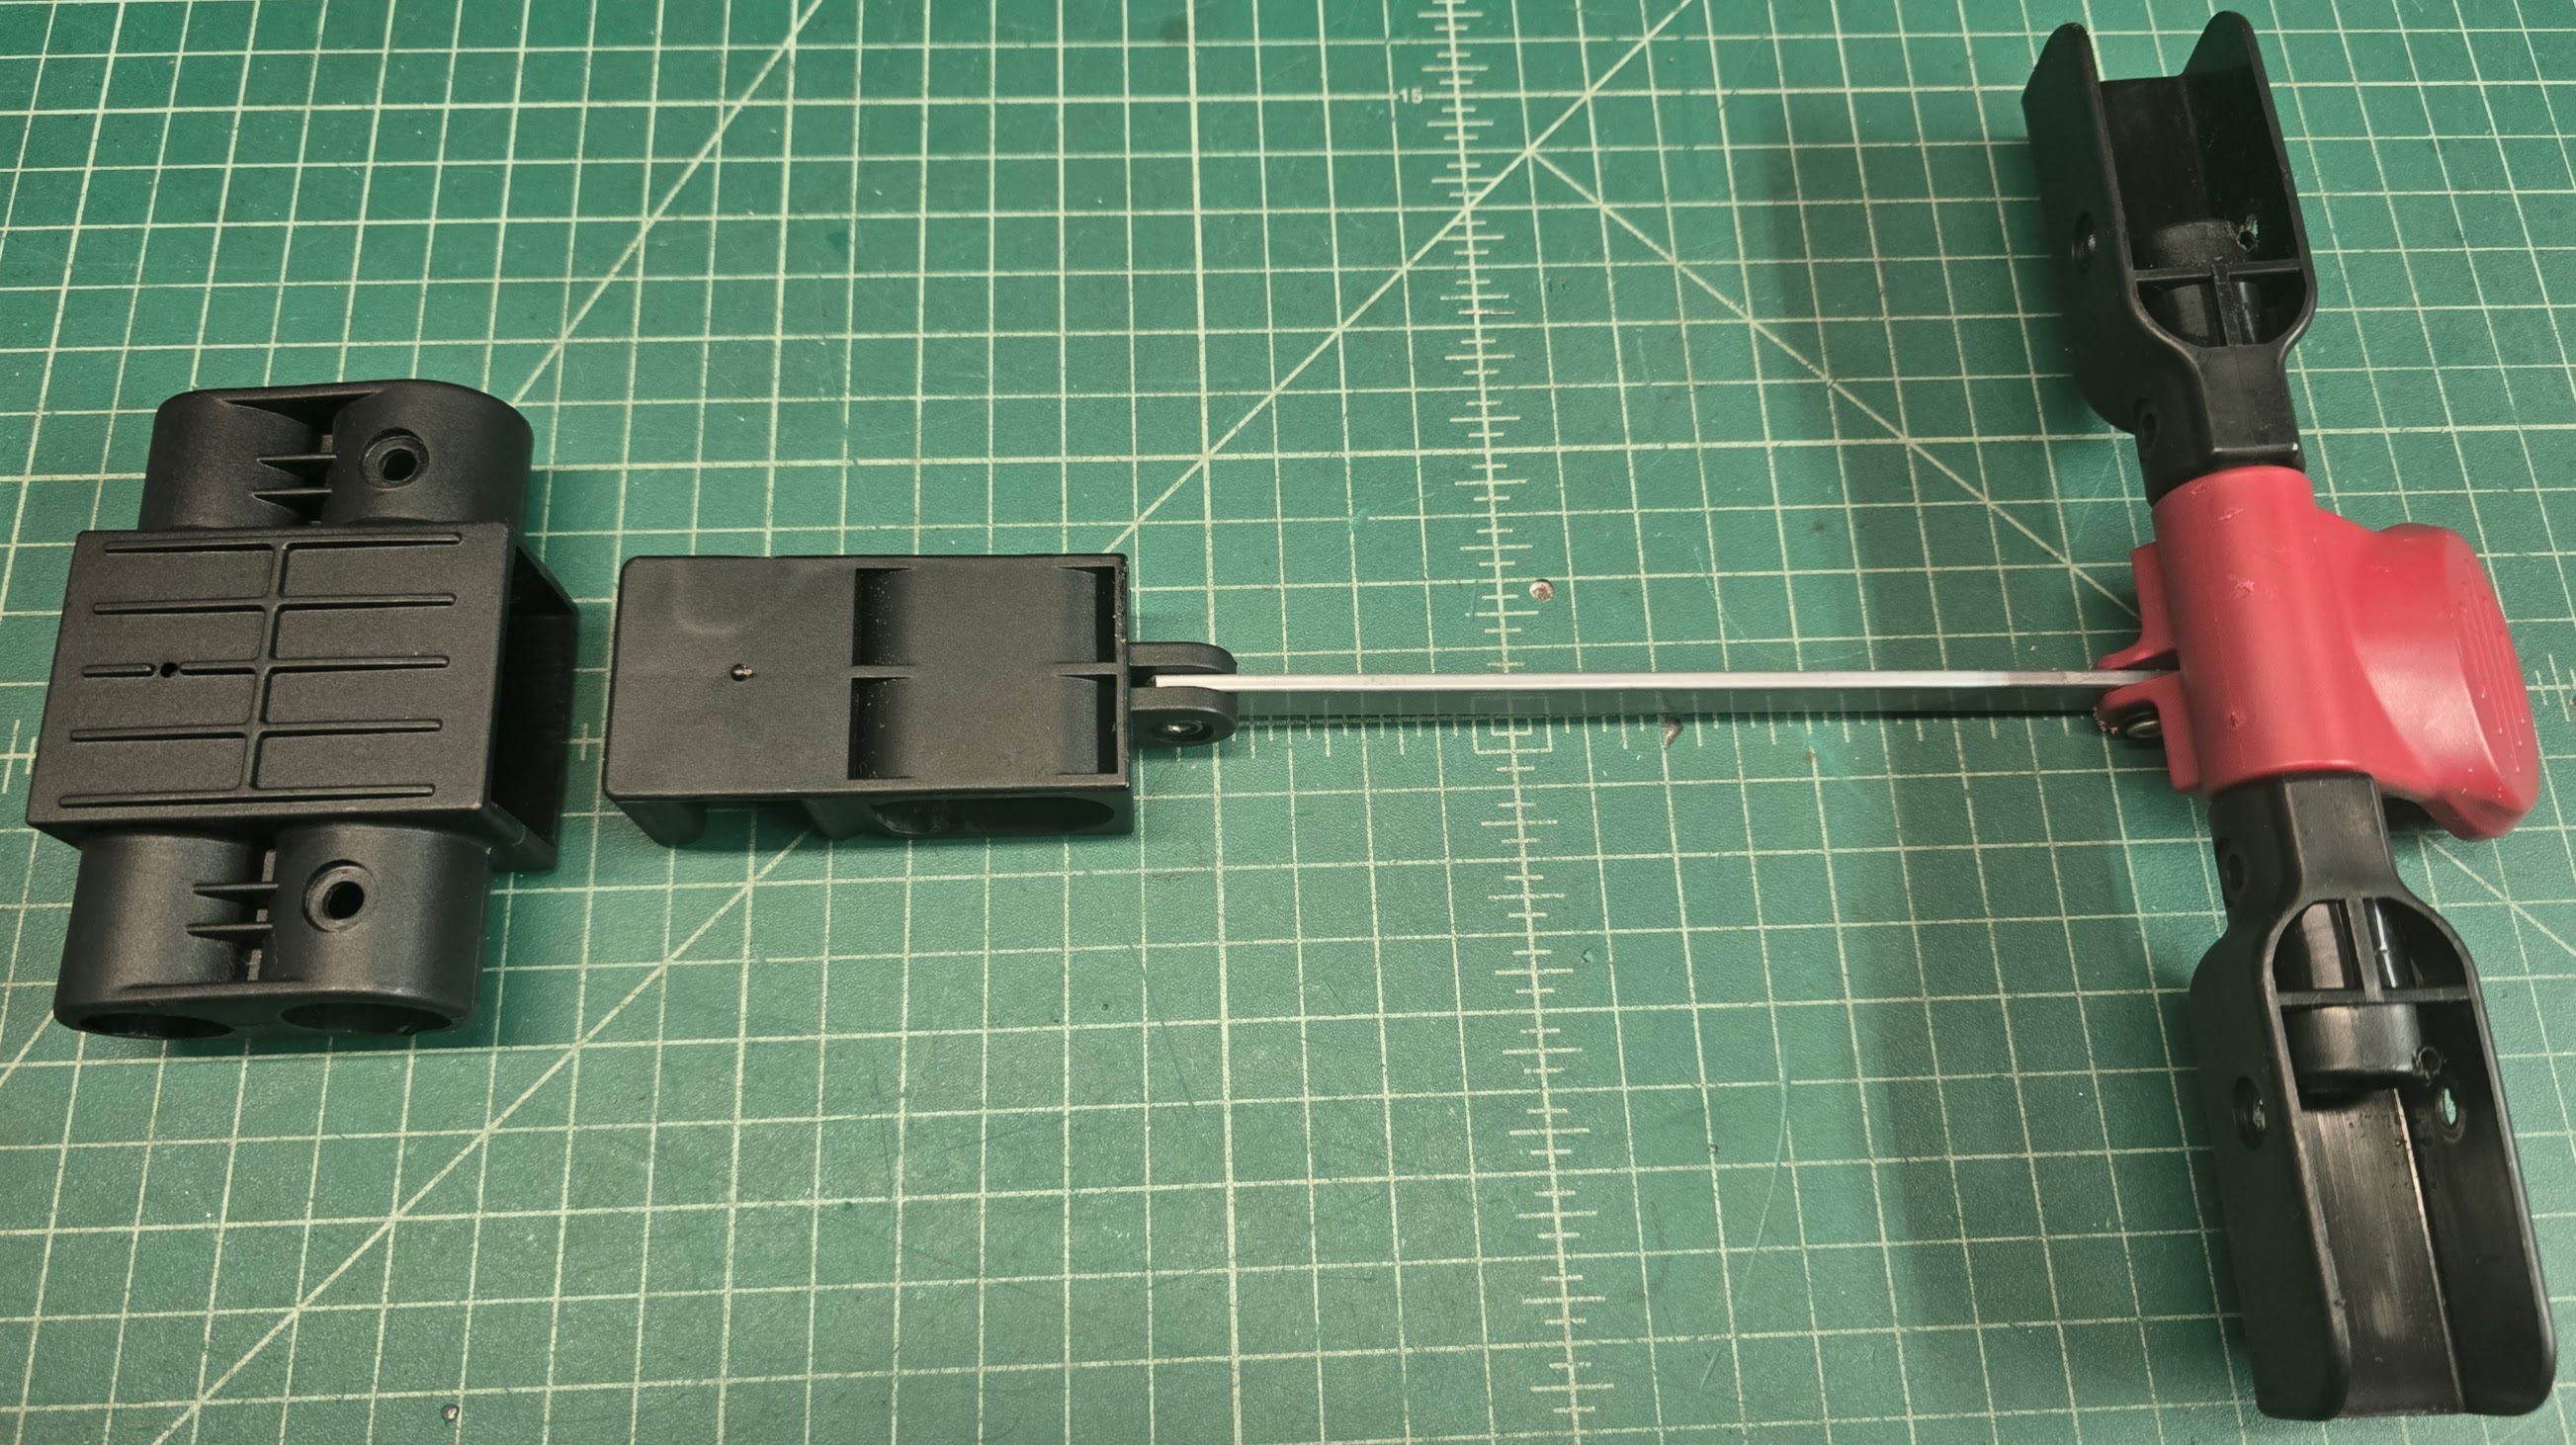
A black plastic/nylon insert is used in the end of the axle and brake housing tubes to allow the wheels to be fastened to the trailer. Again, the larger tube is for the wheel's axle stub and the smaller tube is for the parking brake lock-shaft.
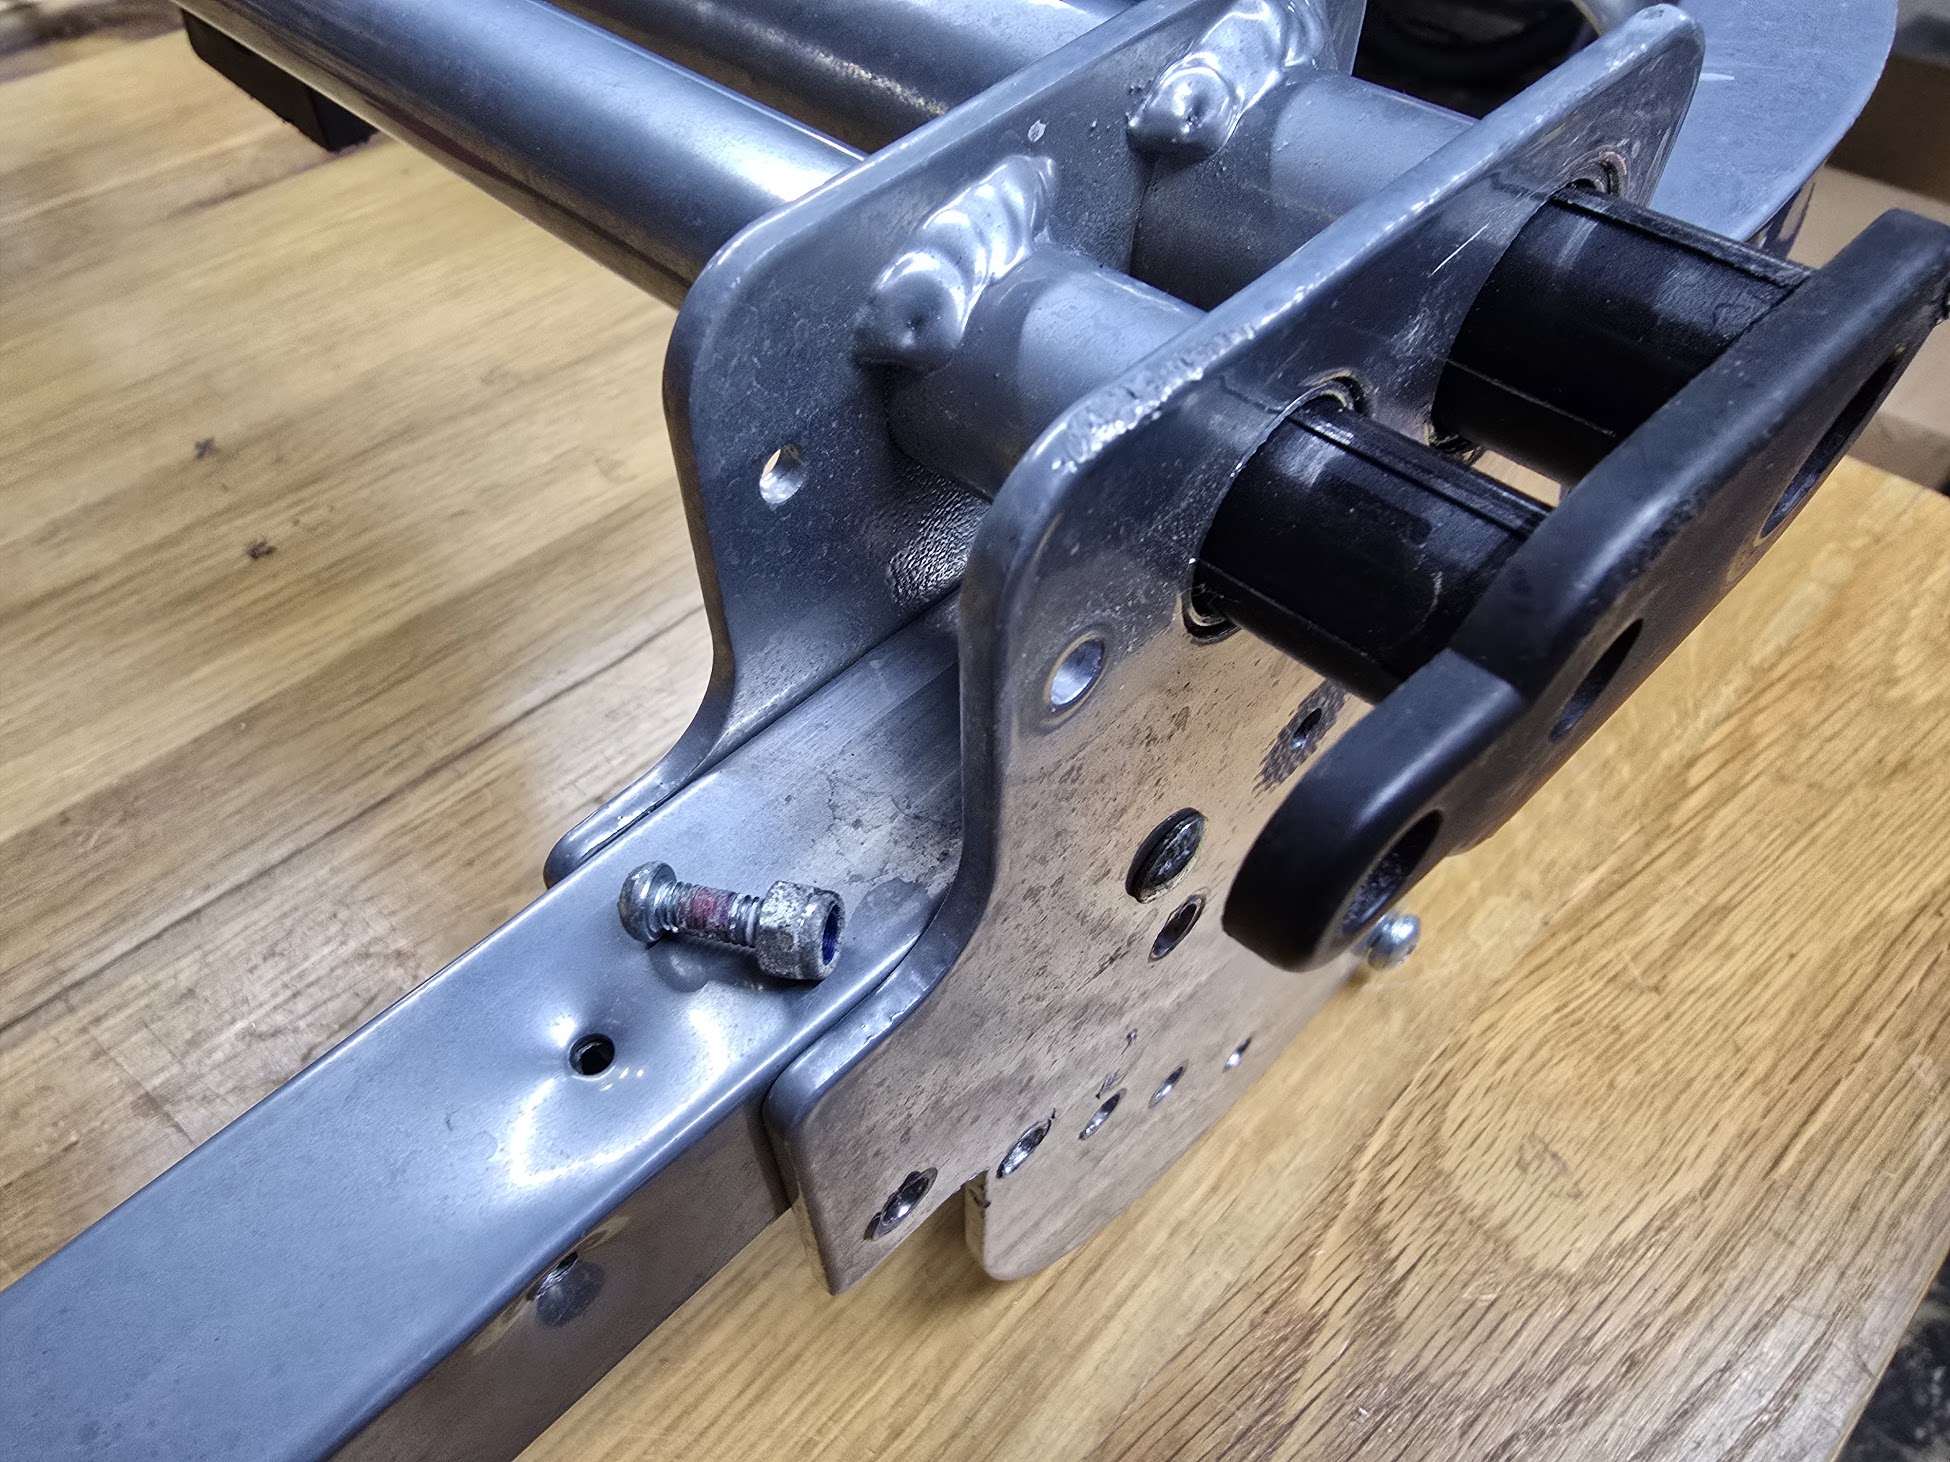
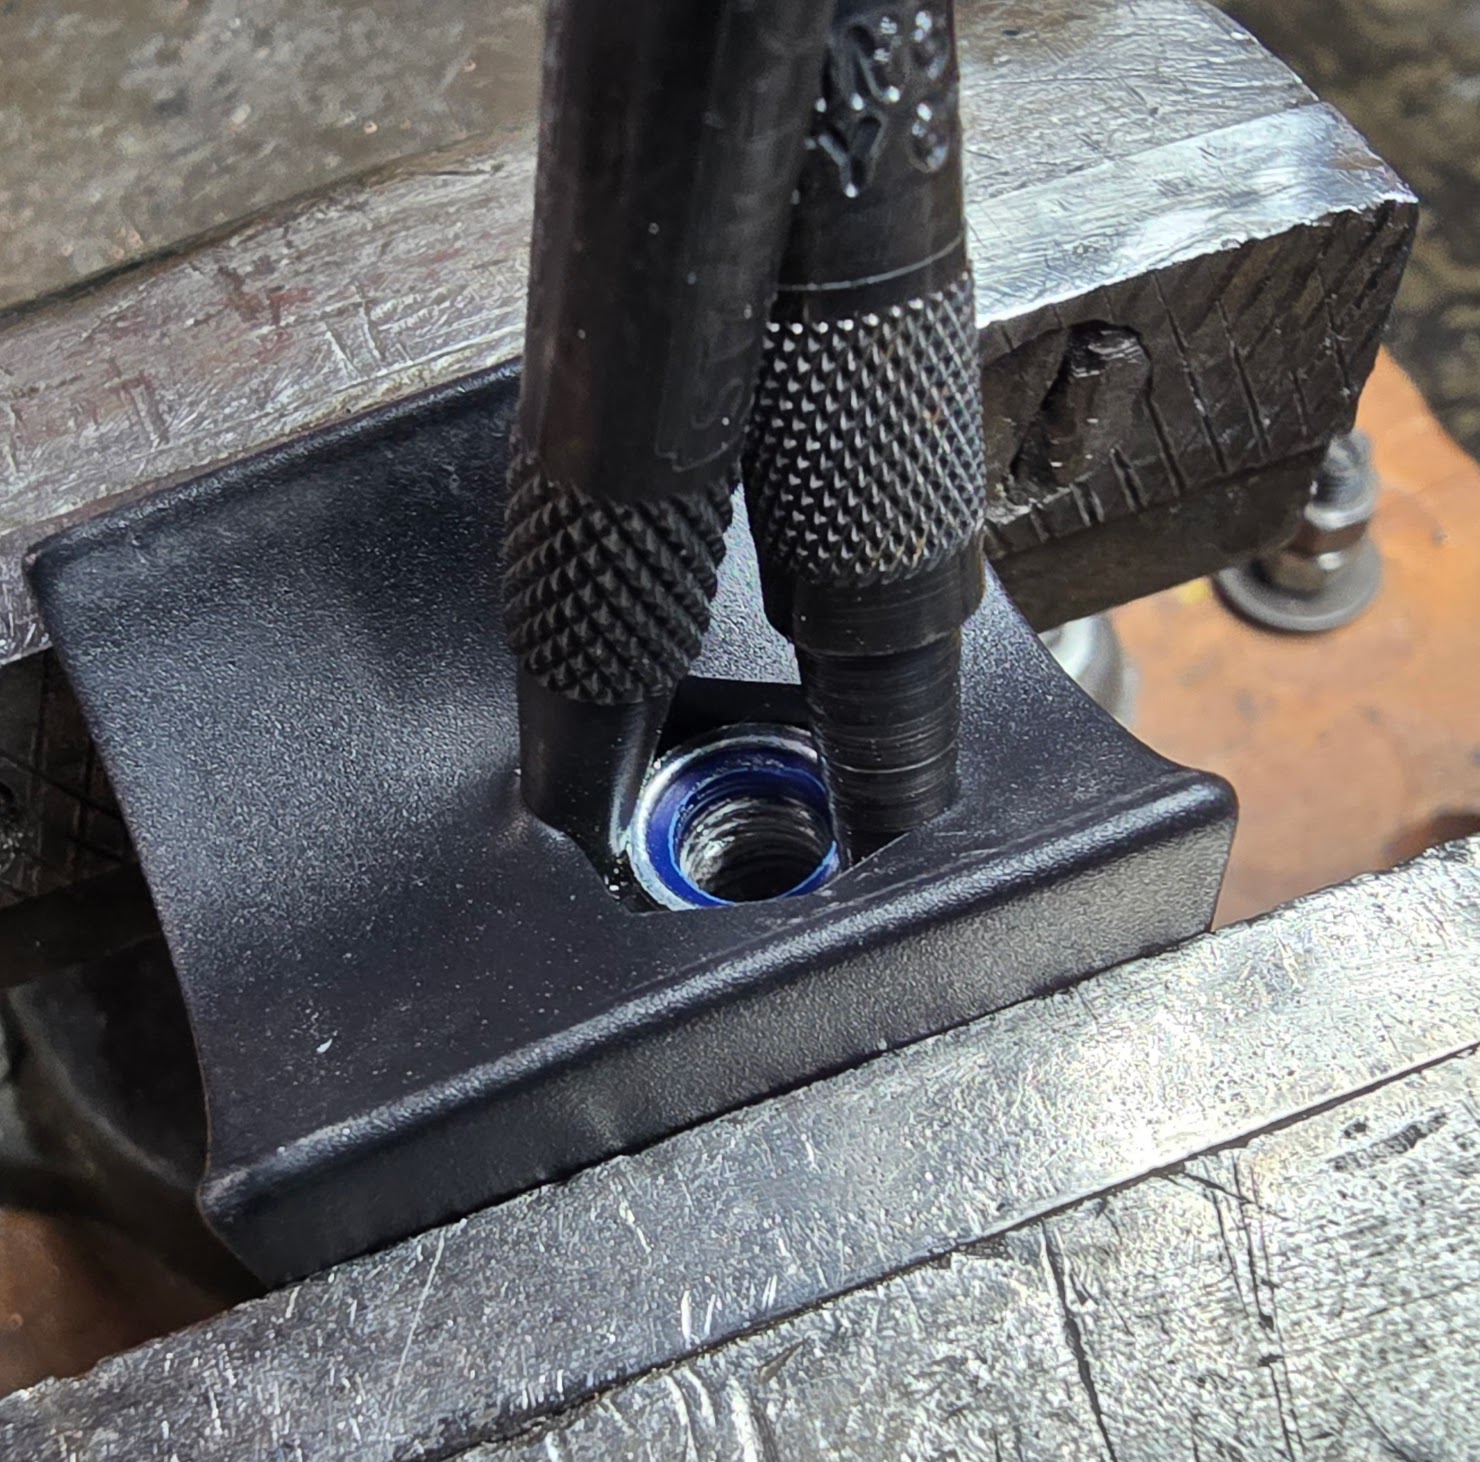
This is part of the assembly that allowed the attachment of a trailer 'tongue' so it could be pulled behind a bicycle. This function won't be needed in the future, so this part is being removed. In any assembly containing a number of fasteners, "there's always one" that won't let itself be removed 'normally.' Here the locknut was also smothered in loctite and relied on the rubber block to keep it from turning, which obviously wasn't enough. In fairness, the engineers probably didn't ever expect this bolt to be removed, and it certainly was never going to become loose accidentally. Since we have plastic/rubber block in an aluminum housing here, using heat to loosen the nut wasn't an option.
This is the bare frame, ready to be resized. We'll be removing 10 inches from the width and possibly more from the length.
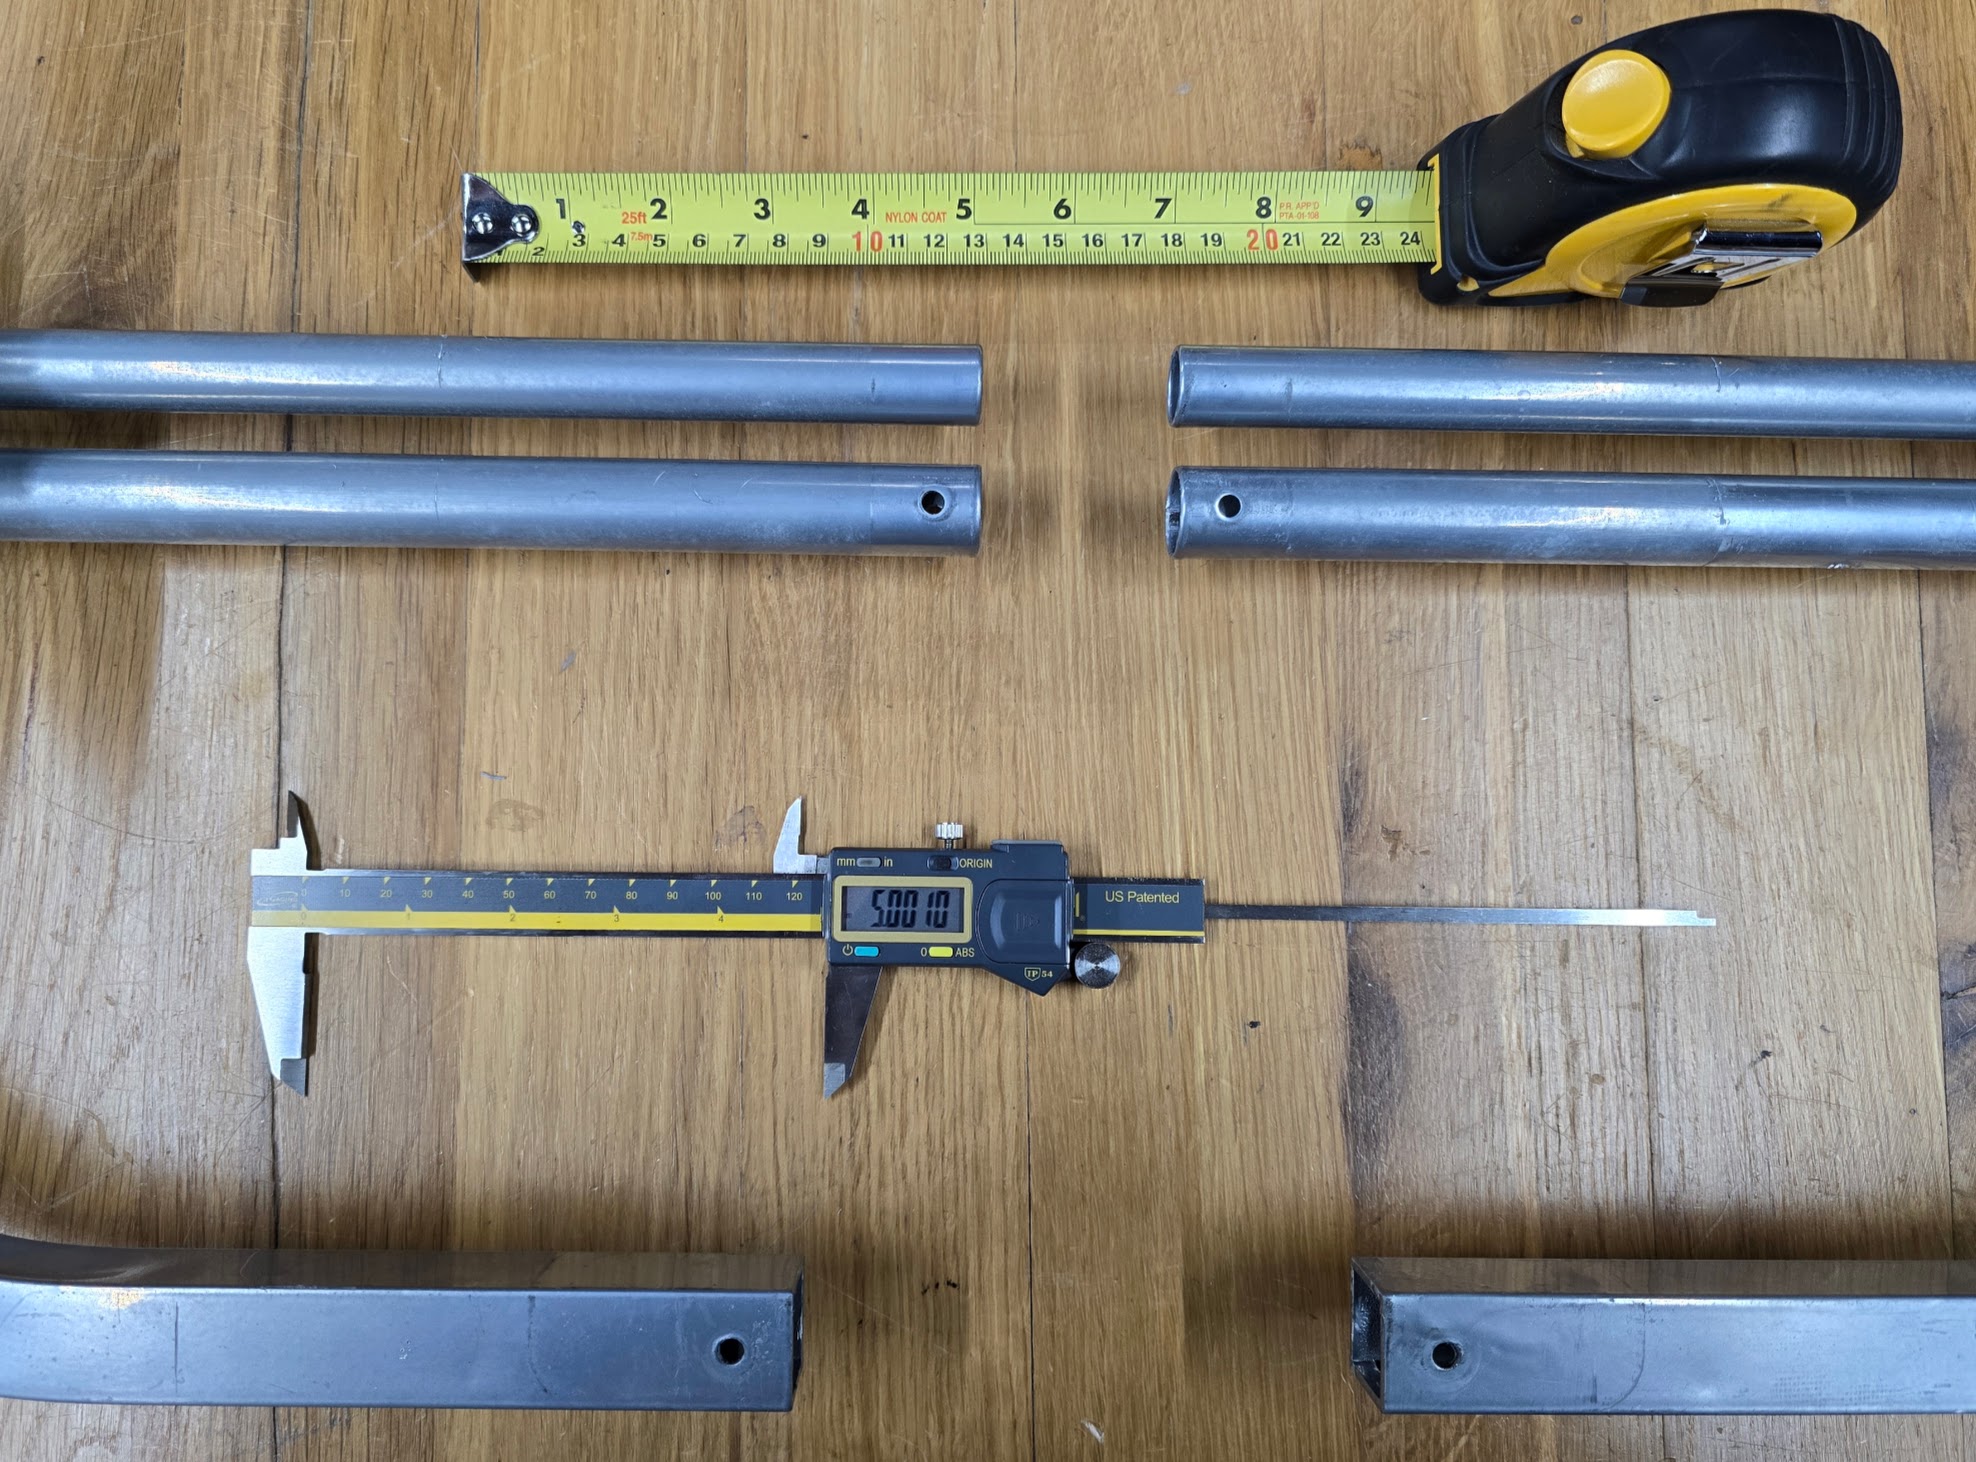
To remove 10" from the width, we find the trailer's centerline and remove 5 inches from all the parts on either side of it. The metal brake rods (not shown here) which slide inside the smaller diameter axle tube will also need to be shortened by 5 inches each.
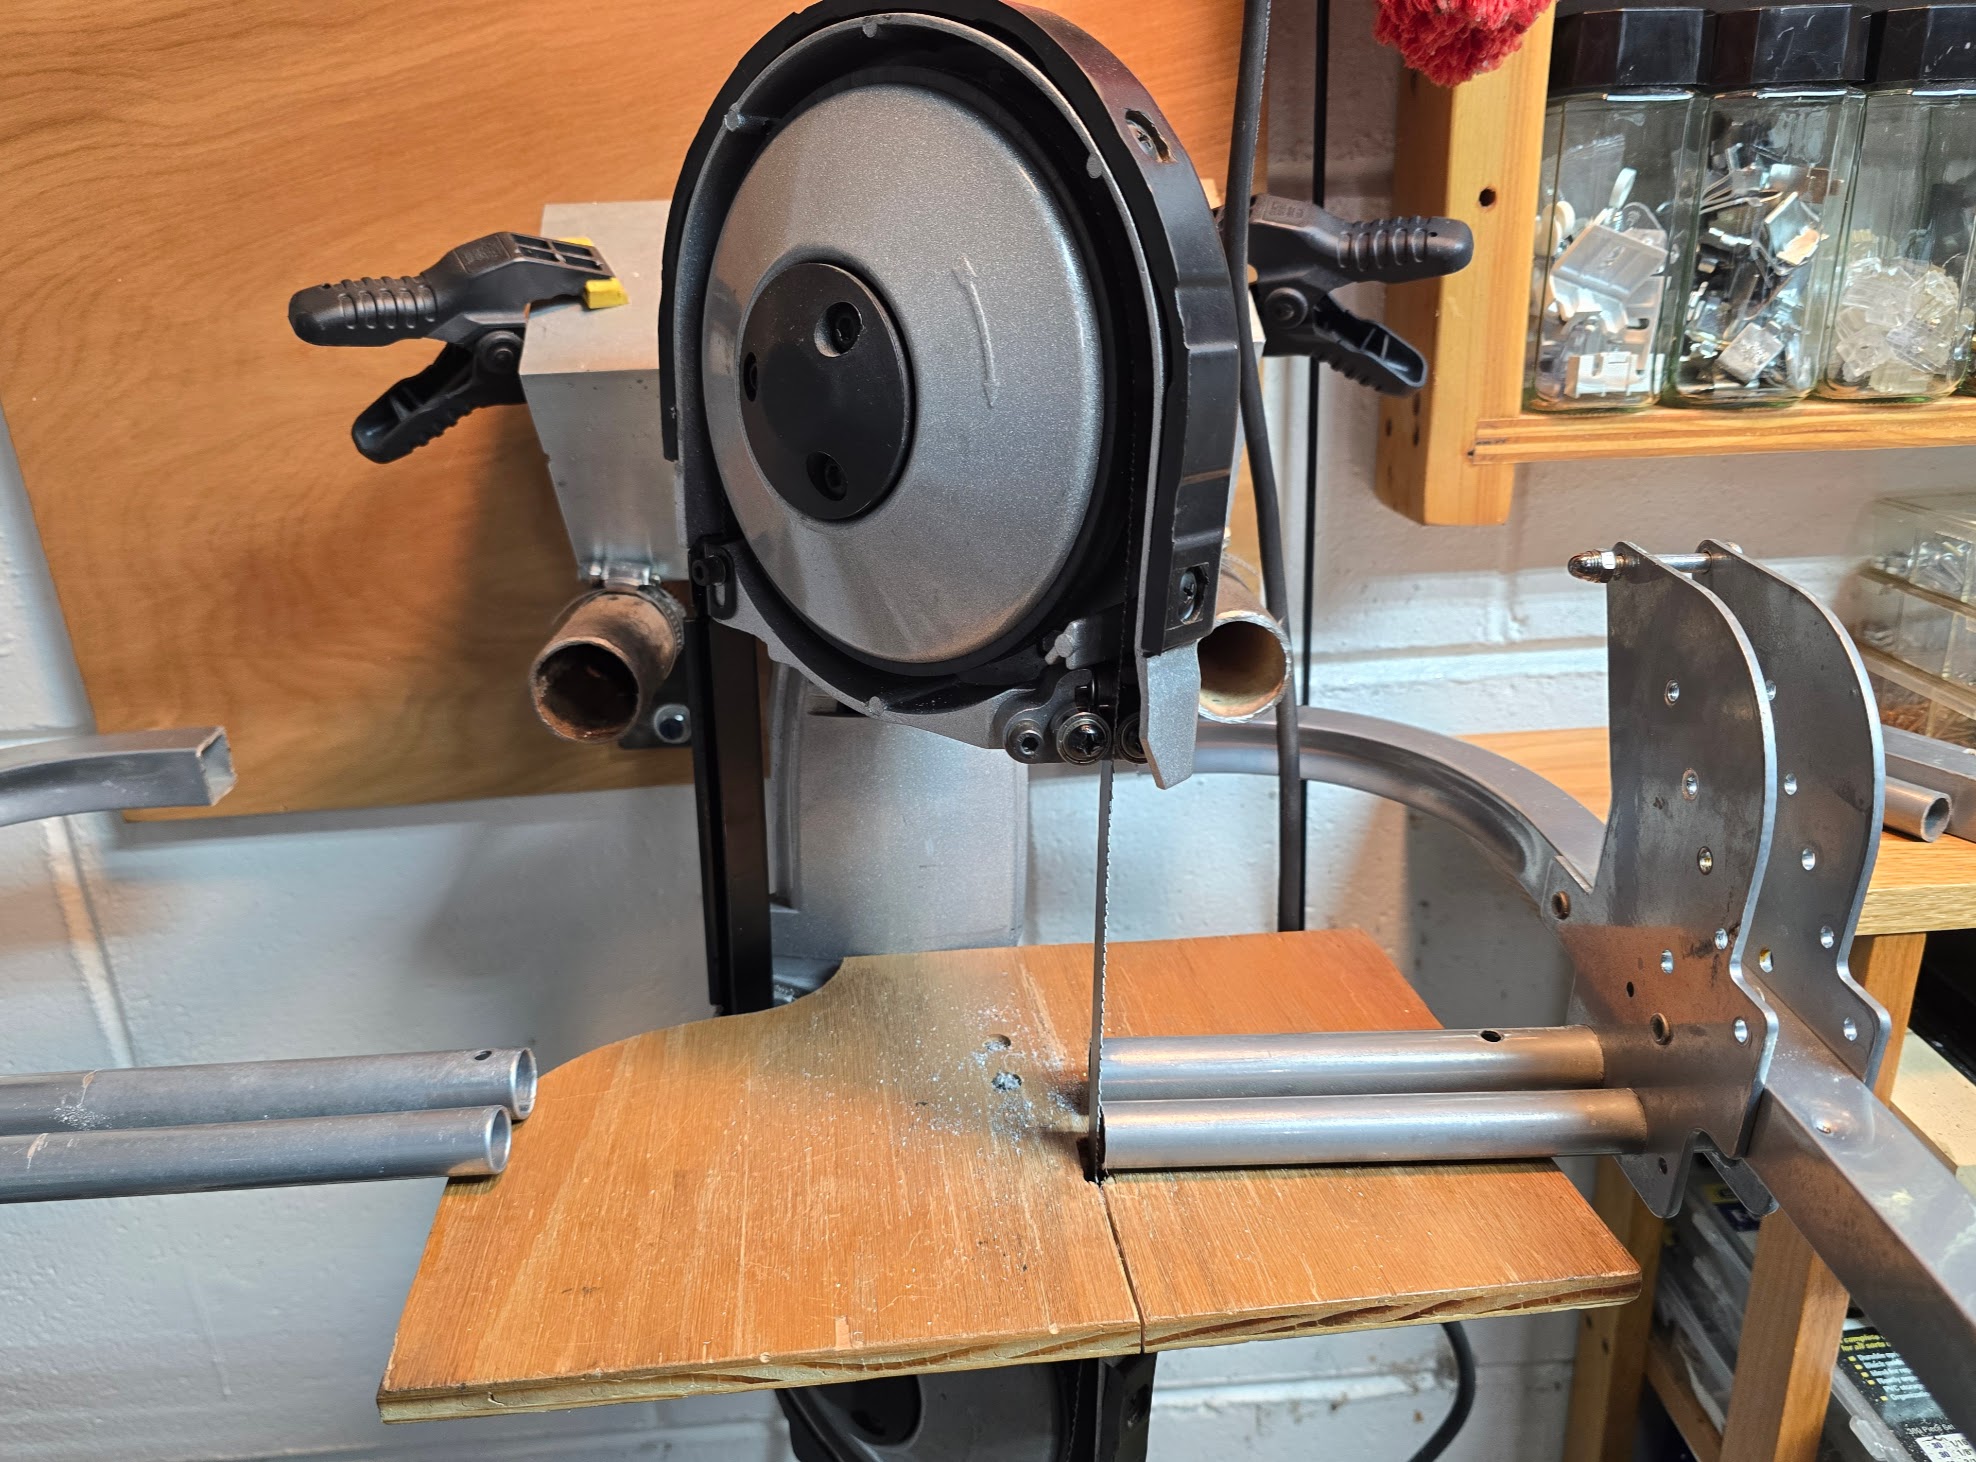
This project has now officially become a whack job. In the extremely rare occurrence in which we escape Murphy's Law, I can actually use the wall-mounted portable bandsaw to cut the frame members where needed. Bill -- this one's for you, since it's your saw.
All pieces have now been cut back to their minimum dimensions. When fastened back together, there will be an opportunity to add some more length to the pieces to be joined.
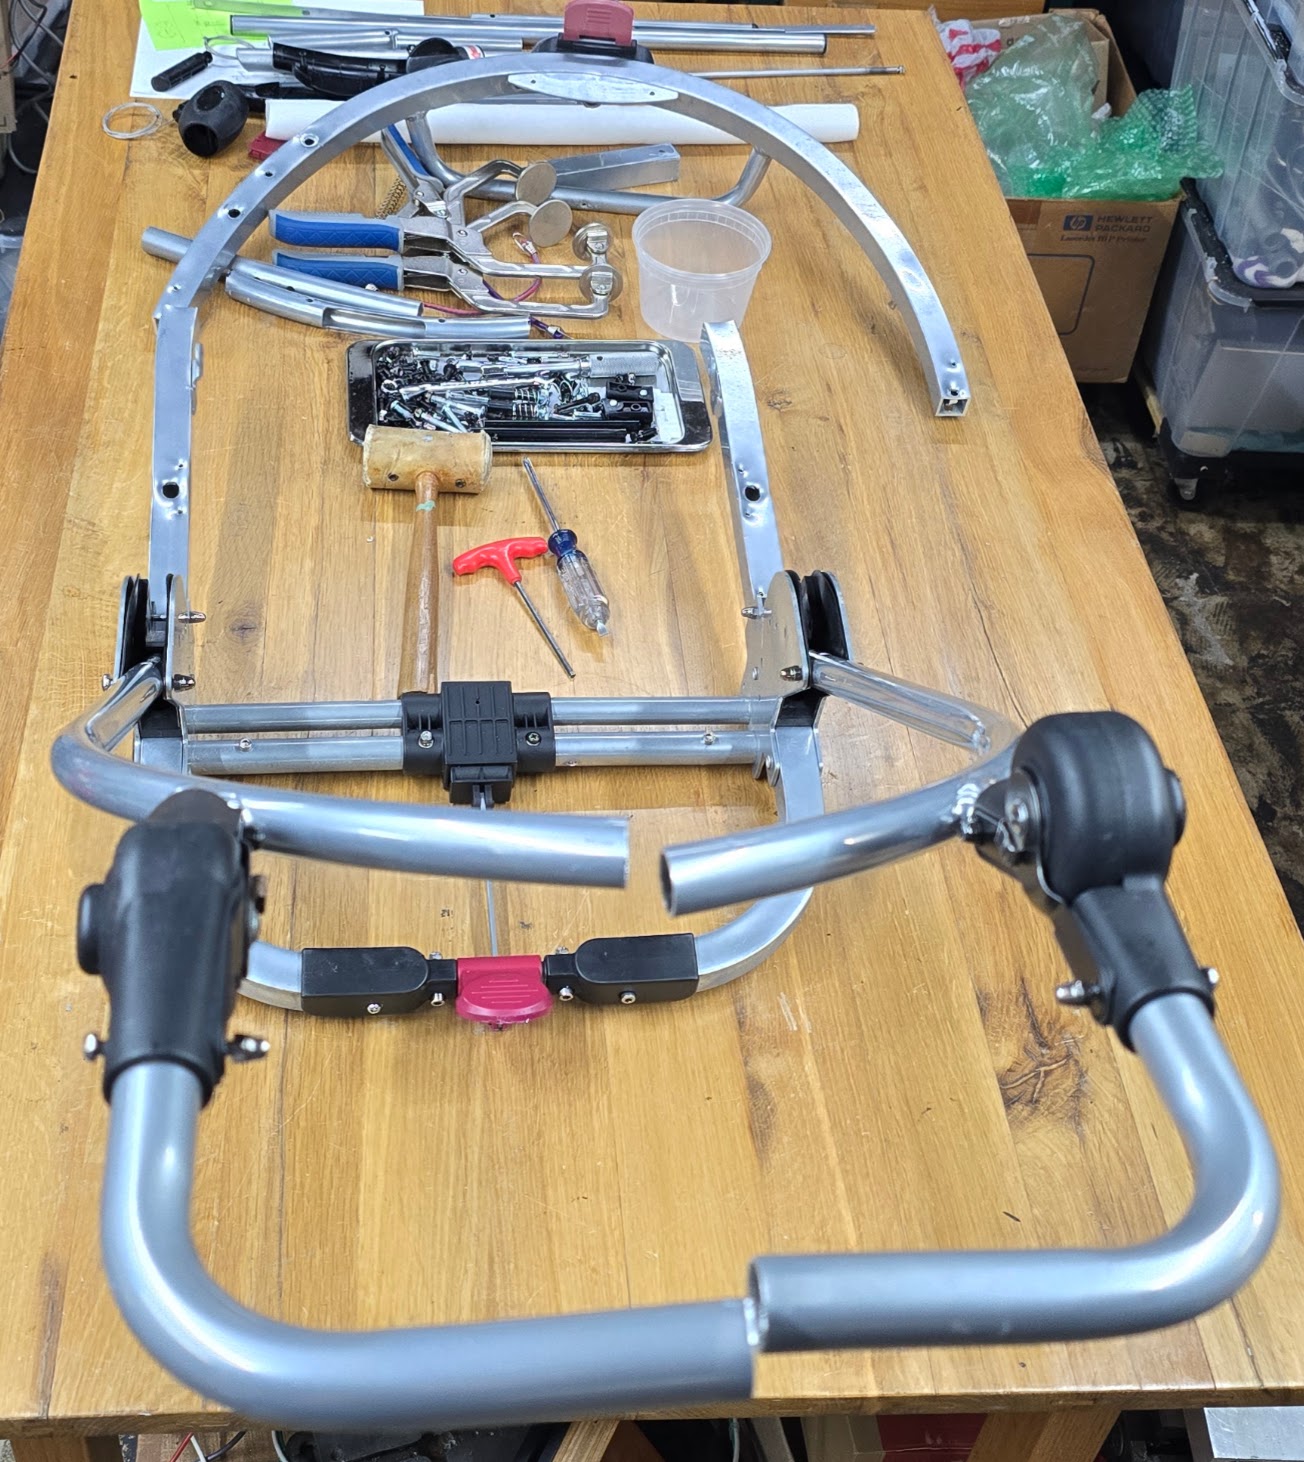
The cut pieces are now loosely joined together. This could be the main frame's new final side-to-side dimension, if rejoined using the original design's components.

With the original frame front overlaid on the rest of the frame, we get an idea of the overall size of the frame. The exact front configuration hasn't yet been figured out -- need inspiration here. The entire assembly so far weights 8.4 pounds, including the two temporary clamps and bungee cords.
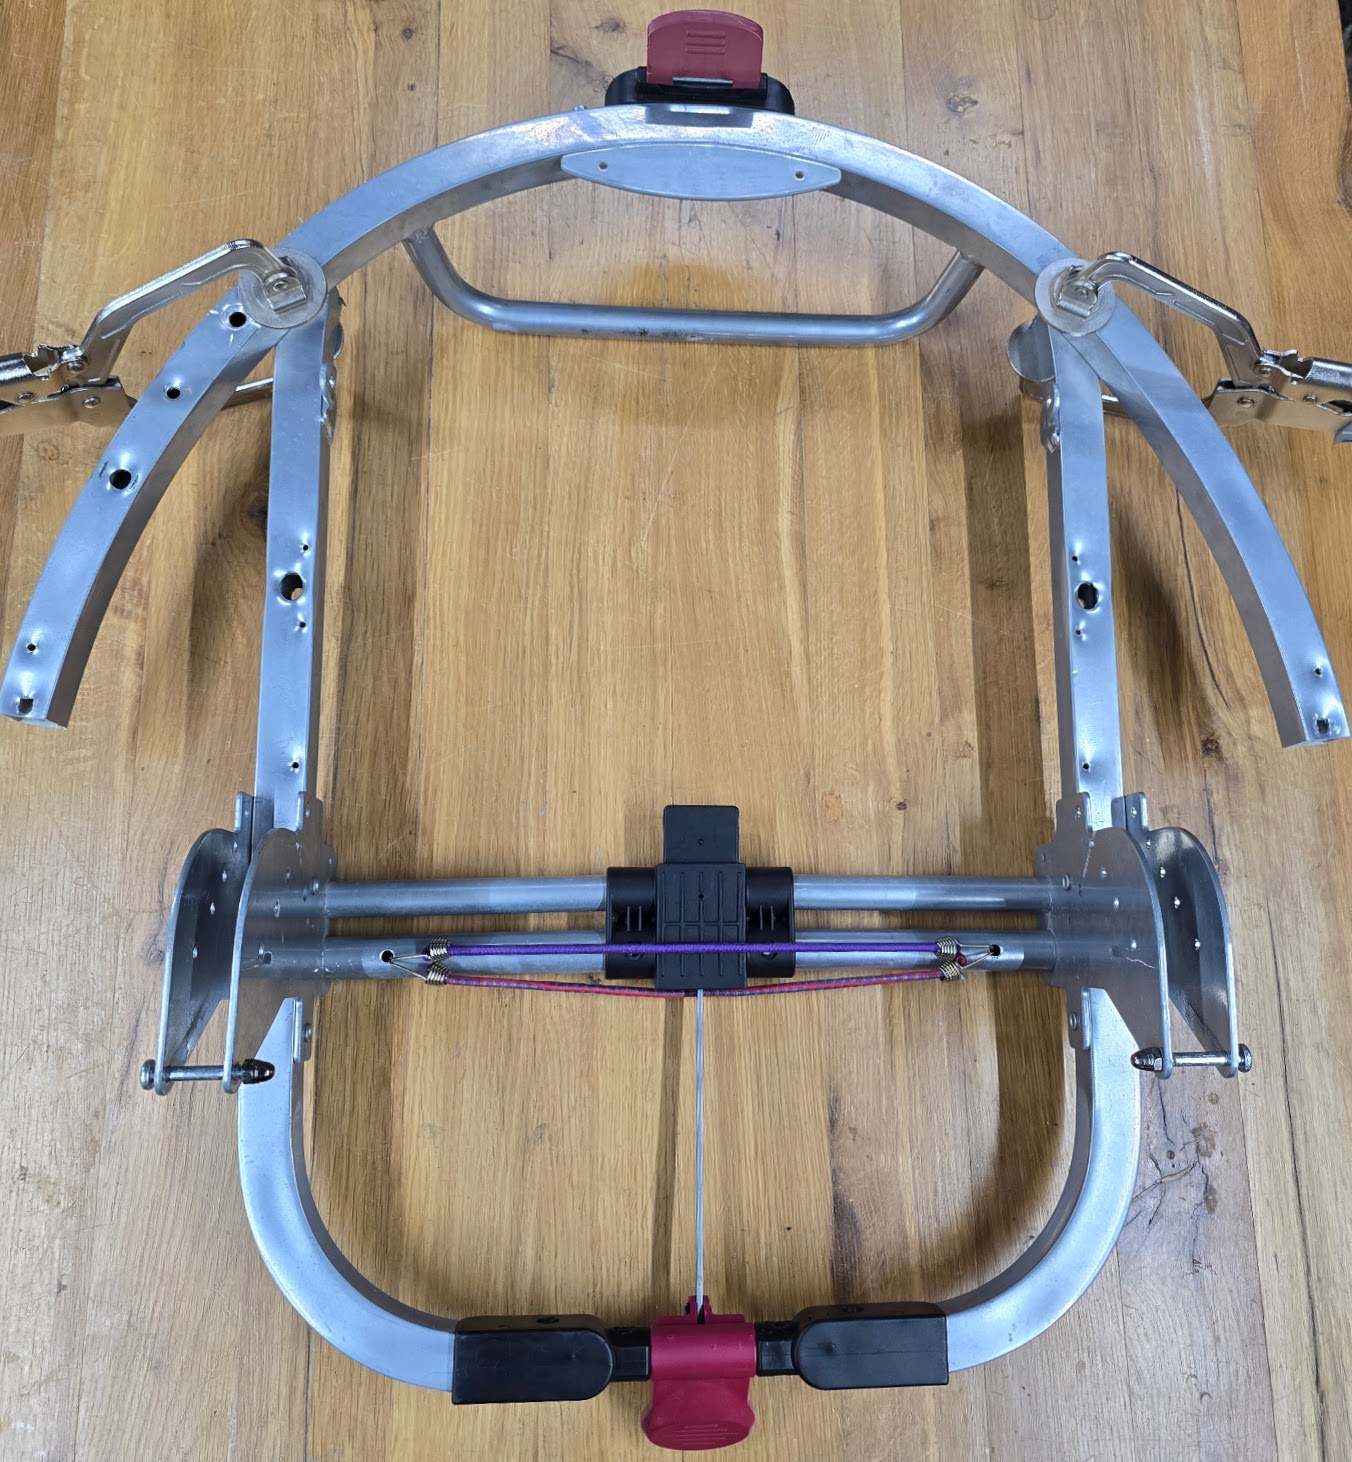
This photo includes the rear handle, used for pushing and steering the original jogger. It includes a mechanism for adjusting the angle of the hand grip portion, as well as an internal cable system which allows the entire handle system to be folded and stored in different positions. These function may not be needed or desired for GiGi, so this design may be changed. The two handle halves, now 10" narrower than they were originally, still need to be joined in the 'new' middle.
The overall design for GiGi is to make it as easy as possible to shop for transport up to a maximum of four (4) standard size paper shopping bags.
Deb let AI do some of the 'heavy lifting' work here (grok in this case) to come up with actual numbers. She also confirmed some of the measurements by taking a tape measure to our local grocery store. As is often the case, we humans disagreed with some of the actual numbers, which will be shown below.
grok says:
**For full bags, add about ½ inch of total clearance in each direction (so the box base becomes roughly 24½ inches by 14½ inches internal).**
The empty-bag footprint (12" × 7") doesn't actually change much when the bags are full-the stiff kraft-paper bottom stays flat and the same size, and the sides are supported by the groceries inside. However, in real-world use:
- The paper has a tiny bit of flex/give.
- Groceries (especially produce, bags of chips, or loosely packed items) can cause very slight bulging above the base.
- Full bags are never perfectly square or rigid; handles and top edges can catch or shift a little when you slide them in/out.
- Without any clearance, the four bags jam together tightly and become hard to lift out individually.
Practical designs (car trunk caddies, InstaCrate-style bins, and DIY grocery-box plans) almost always build in **½ inch total extra** per dimension. That means:
- 2 × 12" sides ? **24½"** (instead of 24")
- 2 × 7" depths ? **14½"** (instead of 14")
You can go as low as ¼ inch total clearance if you want the absolute tightest "as efficient as possible" fit and your bags are very neatly packed, but ½ inch is the sweet spot most people land on for easy loading/unloading without wasted space.
If you build it at exactly 24" × 14" you'll still get all four bags in, but expect them to be snug-more like puzzle pieces than a smooth drop-in. The extra half-inch keeps it efficient while staying practical for real full bags.
Conclusion: try 25" x 15" x 9" Deb shops for commercially available manufactured container that can be used for this. GiGi will just be the carrier for the cargo box, which will have handles and be easily removable from the trailer so it can be carried indoors and set in front of the refrigerator for emptying.
grok says:
**About 20 inches off the ground for the cart floor (the platform where loose groceries sit when there are no bags in it).**
This is the ergonomic sweet spot for your exact use case-wheeling the empty cart around the store, dropping loose items straight in, then lifting them out by hand onto the conveyor or counter at checkout.
### Why 20 inches works best
- **Loading while shopping**: You can place items (cans, boxes, produce, etc.) without excessive bending or stooping. Standard low shopping-cart baskets are often only 8-13 inches off the ground, forcing you to hunch over repeatedly. 20 inches keeps most lifts in the "power zone" (roughly knee to waist height), which is far easier on your back.
- **Unloading at checkout**: The conveyor/counter is typically 35-38 inches high. Lifting from a 20-inch platform up to that level is a short, natural motion with almost no strain-much better than reaching deep into a low cart.
- **Real-world designs confirm it**: Ergonomic utility carts and "safety zone" grocery-style carts (the ones built specifically for repeated loading/unloading) set their lower platform exactly at 20 inches for this reason. It's the height grocery stores and warehouses use to reduce worker strain, and it translates perfectly to customer use.
### Quick build notes
- With common 4-5 inch casters/wheels, you can easily make the box frame so the inside floor sits right at 20 inches total height from the ground.
- If you're significantly taller or shorter than average, you could tweak it ±2 inches (18-22 inches), but 20 inches is the most universal fit for adults.
- The box sides (?17 inches tall for the paper bags) will then put the top rim right around counter height when bags *are* in it later-bonus consistency.
This keeps the whole cart efficient, back-friendly, and genuinely convenient for both the "shopping loose" phase and the "bagged groceries" phase. No need to go lower (too much bending) or higher (harder to load bulky items and less stable).
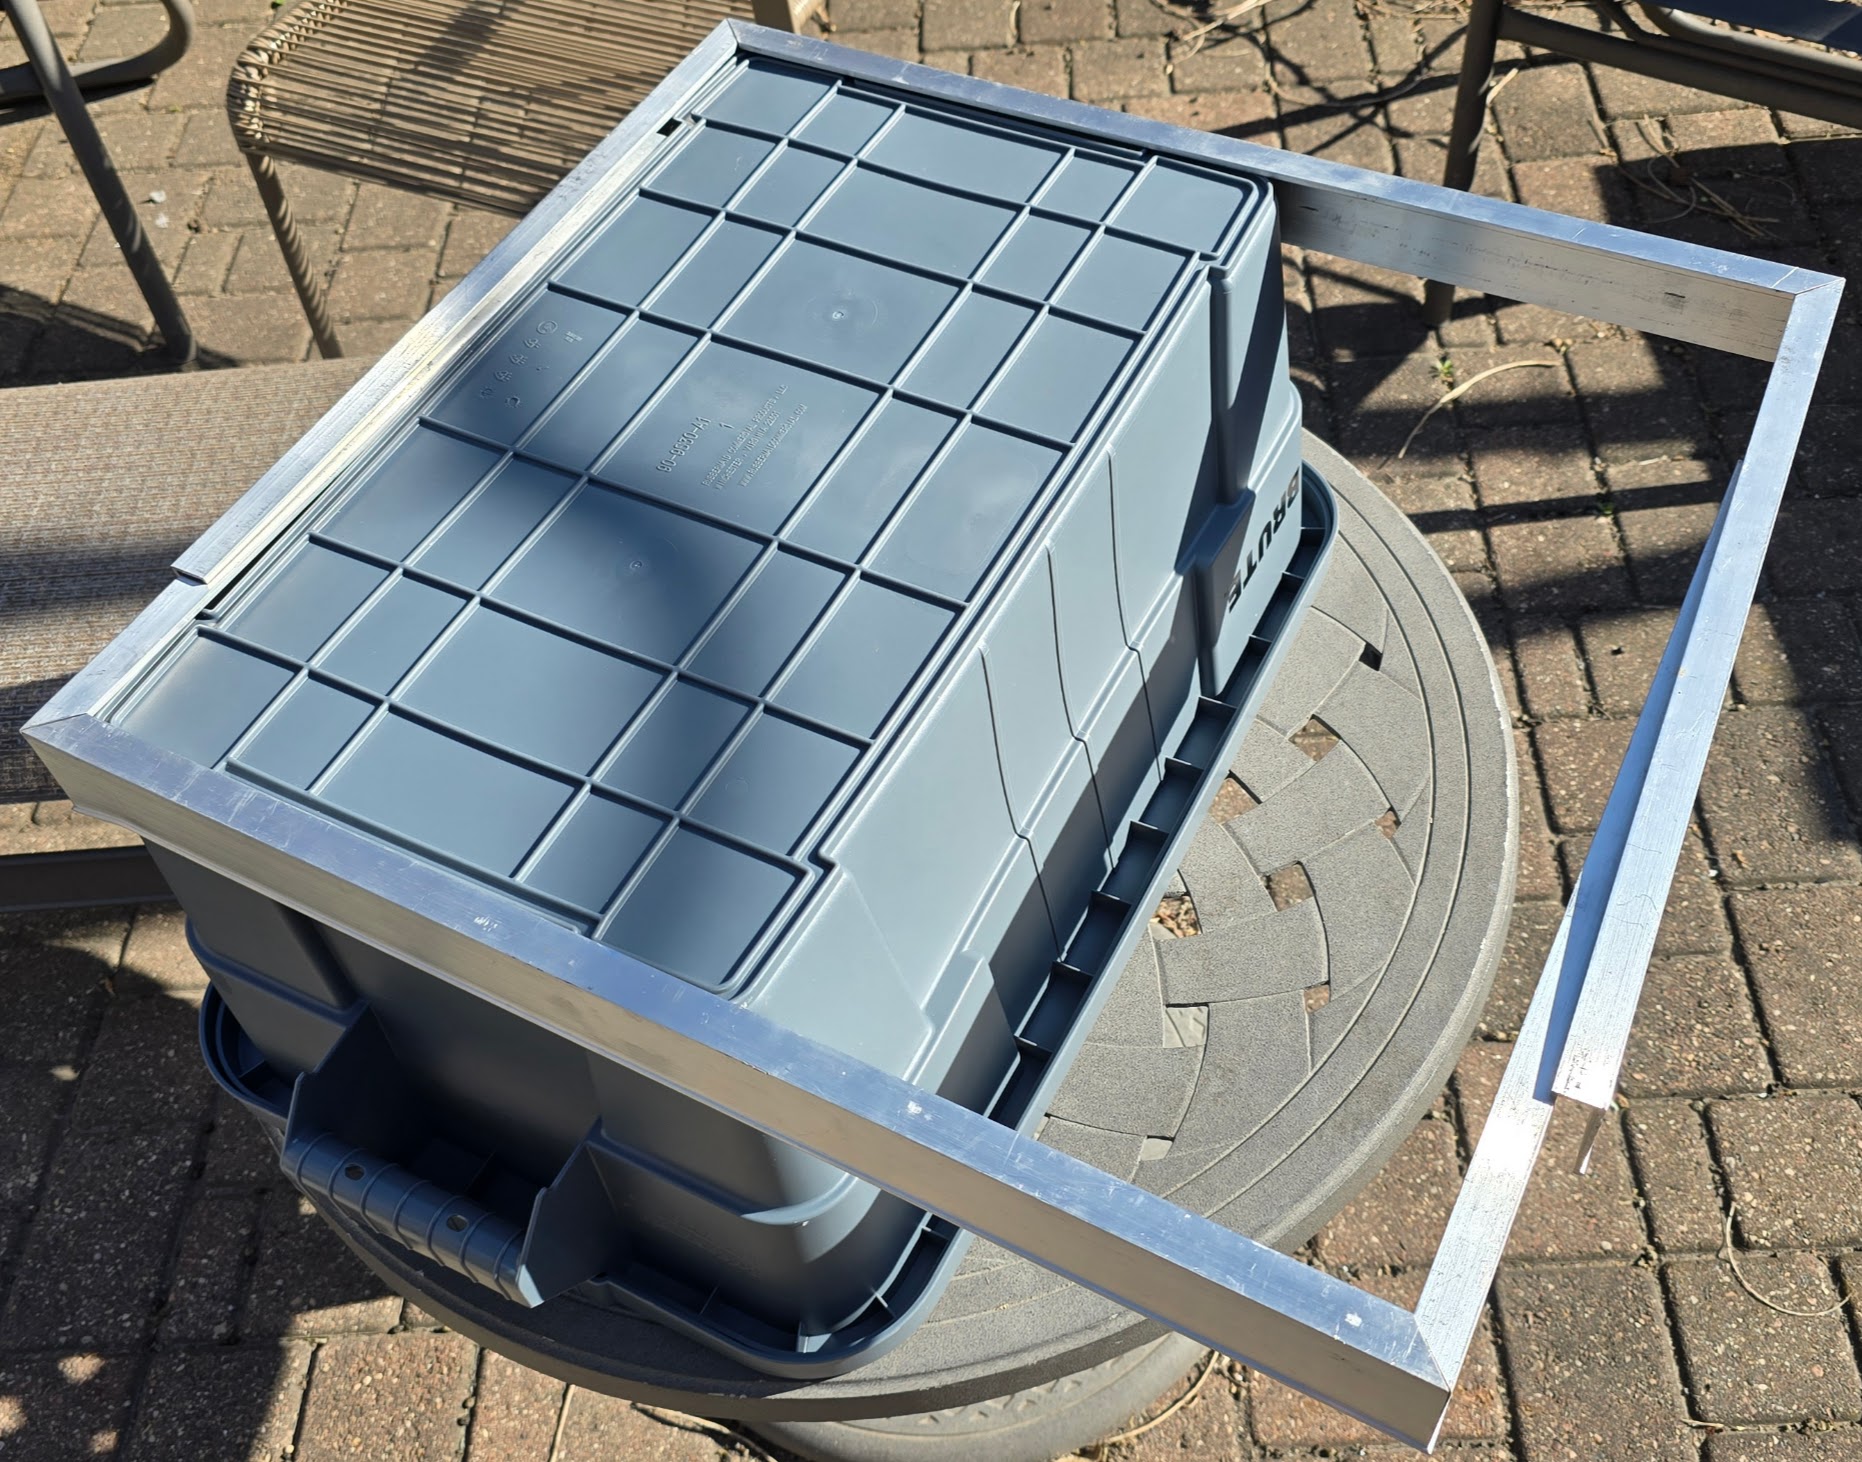
This is a mock-up of the RubberMaid "Brute" storage bin we've settled on as being the removable container for the groceries. While the original calculations called for accommodating four standard paper grocery bags, three will likely be enough. This is especially true since there will be storage space underneath the Brute storage bin for additional grocery/cargo items. With this configuration, the bottom of the storage bin would be about 24 inches above the floor level. However, after a trip to the local grocery store, it turns out that the bottom level of both their normal and their 'lite' shopping carts are right at the same level as my finger tips are above the ground when my hands are hanging loosely at my sides. That would make it 29 inches, so that's what we'll aim for.
Rubbermaid Commercial Stack & Nest Storage Tote W/ Lid, 14 gal, 27-7/8 in L x 16-1/2 in W x 10-3/4 in H, Gray, Plastic
Mfr #FG9S3000GRAY
Zoro #G2473877
product price:$34.97 ea

The bin bottom will fit into an aluminum frame repurposed from a discarded ceiling mounted IR heater. Since the original frame was much larger than the bin, all sides were cut so the frame could be 'collapsed' to the right size.
Both 'L' pieces are now collapsed to the right size and we'll start by riveting them together to hold their shape. More fasteners will be added later.

The support base/platform for the bin is shown here in temporary mock-up form. The four aluminum main support tubes are from the sides of a assistive 'walker' and are quite sturdy, especially since they have a second tube inside the main section. No permanent bolts or rivets will be used until the main pieces are all in alignment, and the position of the rear handle can be established. At this point, the bottom of the bin will be 28 inches above the ground.
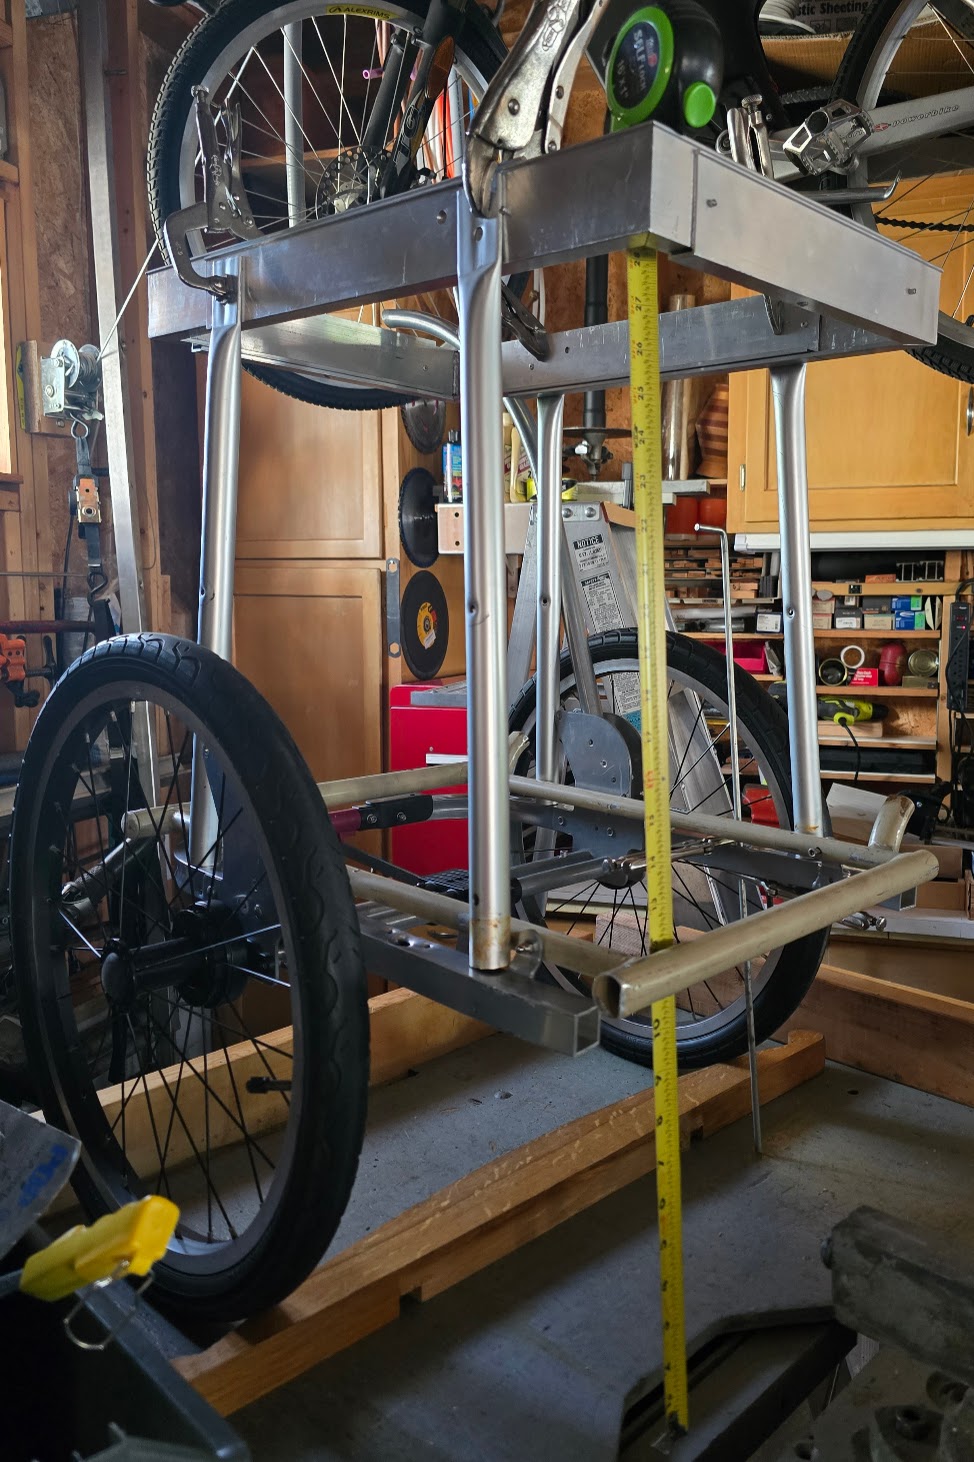
Photo of ...

Return to Top of Page Return to Main Menu