Time to revisit the only type of chair/seat that had in the past come closest to meeting my needs: the car seat.
The goal is to end up with a single seating device which can be used for multiple, and basically very different tasks. On the one hand, the seat must allow me to get work done, while on the other hand it should allow me to stretch out and sleep comfortably for at least three hours. The specific tasks are as follows:
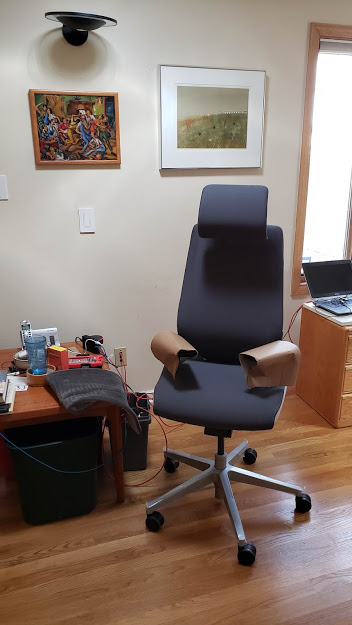
A seat not taken... This "Gesture" model task chair (~$1,200) from Steelcase is very popular with reviewers. Some have likened it to sitting "in the hand of God." The quality is certainly top-notch, but after living with it for several weeks I concluded that it didn't meet the criteria I set out for myself (see above). The seat bottom had a 'hard spot' where my sitbone goes, and my butt got sore after several hours. Even with the addition of a high-tech "Royal Purple" seat cushion (google it), it still didn't feel right after several hours. Also, there were no practical ways of supporting your feet and legs with anything coupled to the chair.
Time to revisit the only type of chair/seat that had in the past come closest to meeting my needs: the car seat.
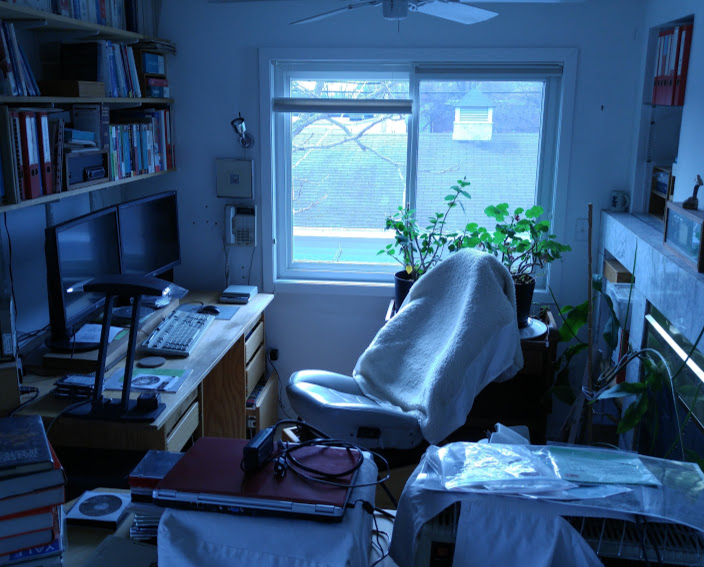
Something along these lines, maybe... (Apr 2021)

The wooden base pictured above is (temporarily/permanently) repurposed from my DIY recumbent bike workstand. The base doesn't really work well for that anymore due to the battery mounting rails which now occupy most/all of my recumbent bikes. The 12V SLA batteries are a temporary power source allowing adjustment of the 6 motors that control the seat positioning system.
This is the selected BMW car (driver's) seat parked in my office, back in 2016.
Acquired years ago, this seat was purportedly the driver's seat from a BMW 740iL sedan. The seat's vintage is supposedly ca. 1995, but I suspect it may be an earlier model year. Bimmerheads refer to this model series as the E38 cars. The seat, when acquired, was a take-out that had been re-upholstered but then never re-installed in the car. I used it for several years as is, without having made any adjustments or electrical connections. I made a square wooden 'box' platform, with wheels, for the seat to sit on. There was no hardware to fasten it to the base, so it was held there by gravity alone. I could tip it backwards if I really tried, but in general it was well balanced and very comfortable. The functionality of any of the motors and other seat components was unknown at the time.
Photo of the top of the control box, mounted under the seat. Initial simple attempts to use this box did not succeed, so it's not known whether or not the control box is broken or simply not connected correctly. It seems like this single seat has more wires and switches than an entire '67 VW Beetle, and I've not been able to find any definitive documentation for this particular seat version. The time required for a full reverse engineering process was just long.
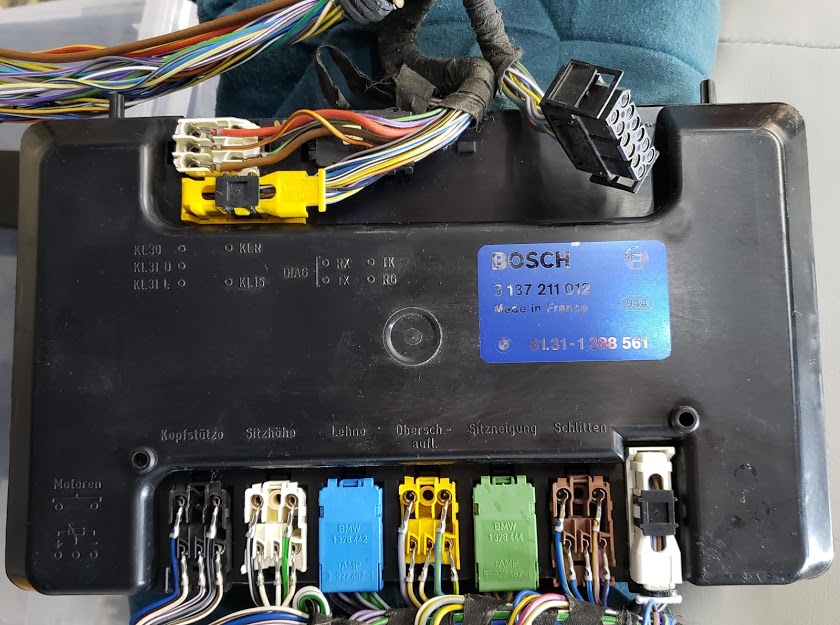
There a six plugs visible at the bottom of the control box, each with a unique color. Over the course of the quarter century that this seat has been exposed to the atmosphere, the plastic housings of these plugs have become extremely brittle and they break into small pieces at every opportunity. Each plug corresponds to one of six 12VDC universal motors that control the seat's movements. Beginning from the left, these are the available functions:
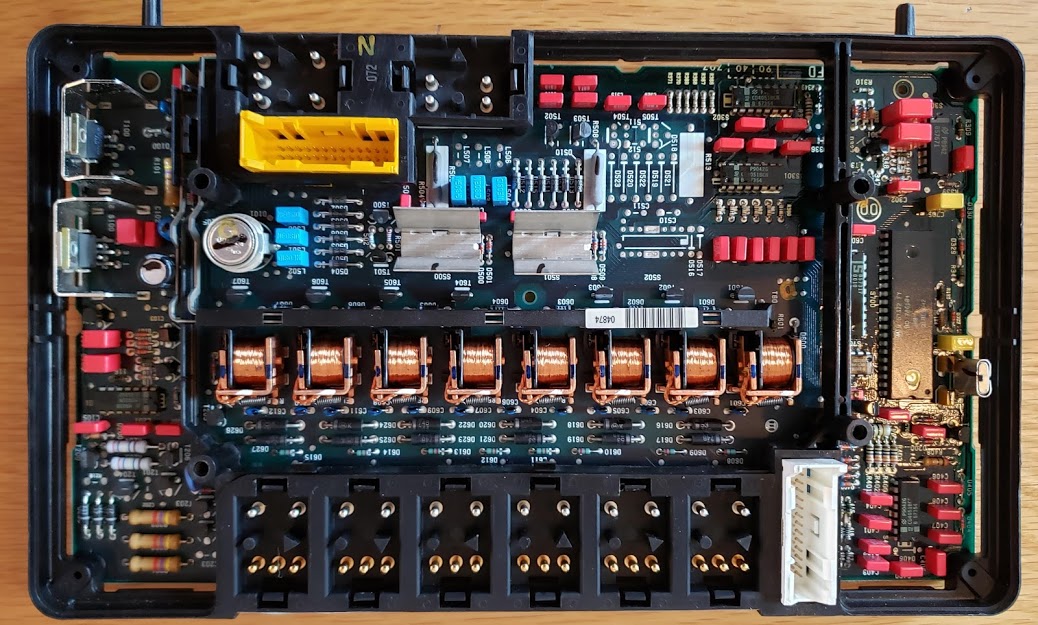
Shown below is the component side of the seat's controller board, and is what you see when the plugs and cover are removed from the controller box (as shown in the photo above).
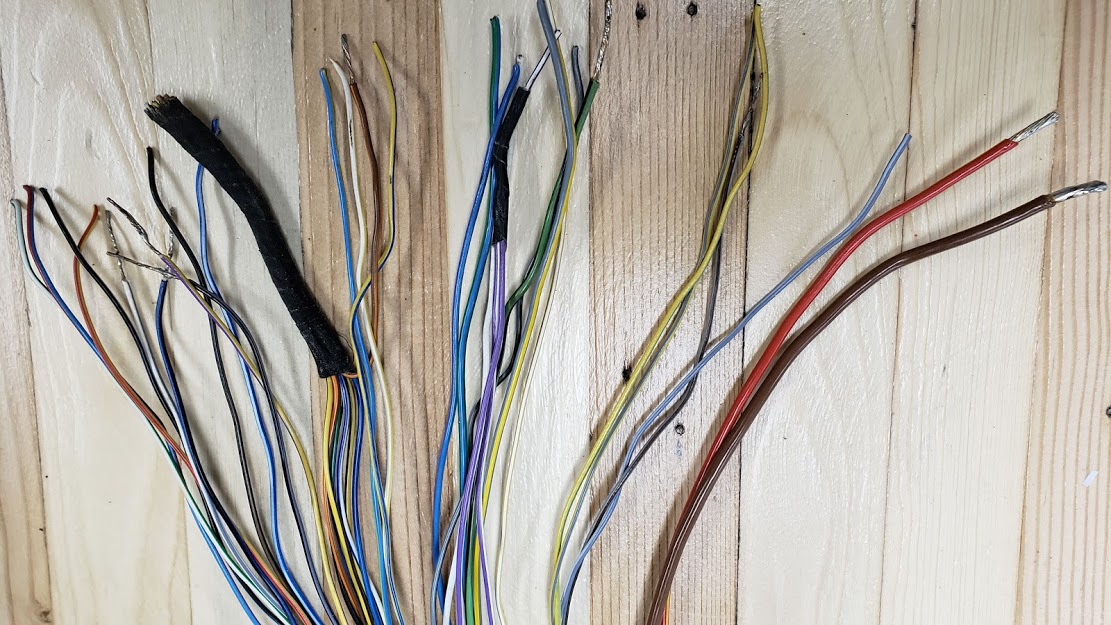
Seen below are all of the wires coming from the car, and going to the main connector under the driver's seat.
For the best information about doing this, google string: "DIY car seat office chair"
Display a wiring diagram for the entire E38 car (PDF, 60 pps, 1995).
See page #:
16 - driver's seat lumbar circuit (single motor moves physical bar across back of seat, simpler than '95 schematic)
23 - front heated seat wiring (back/bottom heater elements: WHT/YEL+BRN; WHT/BLU from htr switch)
31 - headrest circuit;
39 - memory seats circuit
One of the best online resources I found for working with legacy BMW carseats were two seemingly related sites called e38.org and bimmerboard.com. As of early 2021 they were still online, but not necessarily active. E38.org, "sponsored" by bimmerboard.com, had its last category posted in 2013.
See example post on bimmerboard.comthat covers the seat heating installation/repair.
Somewhere along the line, while I was mulling over the method I was going to use to make a new base for the seat, as well as having a control system that met my needs, my wife went seat shopping and ordered a pair of 'store bought' chairs for our living room. So, for the rest of 2021 and now most of 2022, I've been sitting on a chair made somewhere in Scandinavia which meets most of my goals, as well as those of my wife.
On 6 Nov 2022, this project found a new steward who will put more time and energy into it. Good luck, Neill, and let us know how it goes!